9 Shipping Container Home Ideas (Plus 1 Practical Hybrid Build)
Shipping container homes work best when you plan around the three things steel makes difficult: insulation, moisture, and structure. The ten layouts below range from a single 20-foot backyard ADU to a hybrid build that pairs a container core with wood-framed rooms, with notes on foundations, insulation, cost, and when to hire a pro.
Steel conducts heat and cold quickly, so an uninsulated container floor feels icy on a winter morning and the walls can drip with condensation. Containers are also heavy, so every design needs a solid foundation and careful anchoring, plus barriers and framing that stop moisture from condensing on the steel.
Before you commit to any layout, check local zoning, setbacks, and permit requirements: container homes generally need building permits just like any other house. Use the ideas to compare ceiling height, window placement, and usable width, not just the exterior look.
1. The L-Shaped Two-Container Courtyard Layout
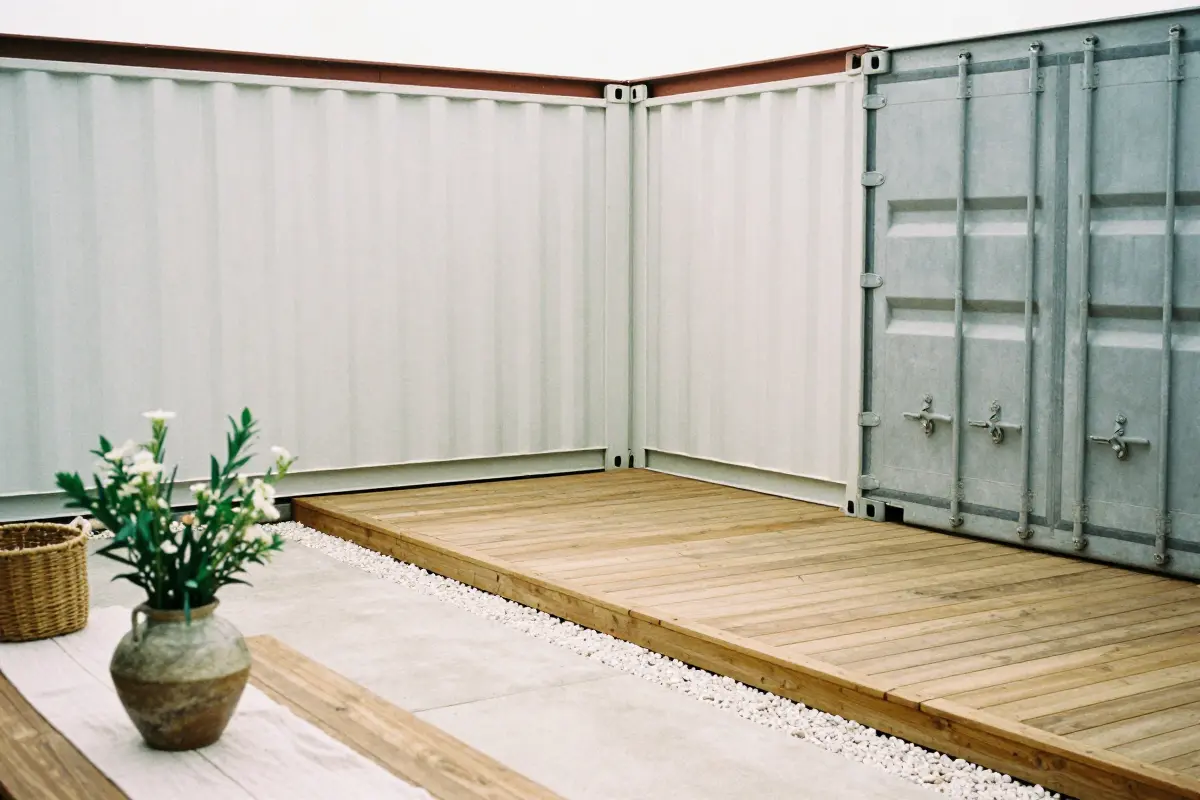
A glass-fronted living room opens onto a patio framed by two 40-ft containers meeting at a clean 90-degree angle. The L-shape shelters the courtyard, blocks prevailing wind on open-field sites, and lets sightlines stretch beyond the compact footprint.
Cut a door in each adjoining wall and reinforce the intersecting corners with steel plates and gusset brackets to keep the frame rigid. A common mistake is neglecting drainage along the seam, which lets water pool and attack the welds and corner steel.
Use pressure-treated decking on sleepers over a simple concrete slab for an inexpensive, weather-ready exterior floor. This layout fits small families or remote-work retreats that want clear zones for sleep and shared living.
Cutting and framing the openings is a job for an experienced fabricator, and a structural engineer should approve the corner reinforcements.
- Wind protection
- Clear zone separation
- Moisture-prone seam
- Requires drainage planning
Improper corner reinforcement can compromise structural integrity.
2. The Parallel Twin with an Infilled Gable Roof
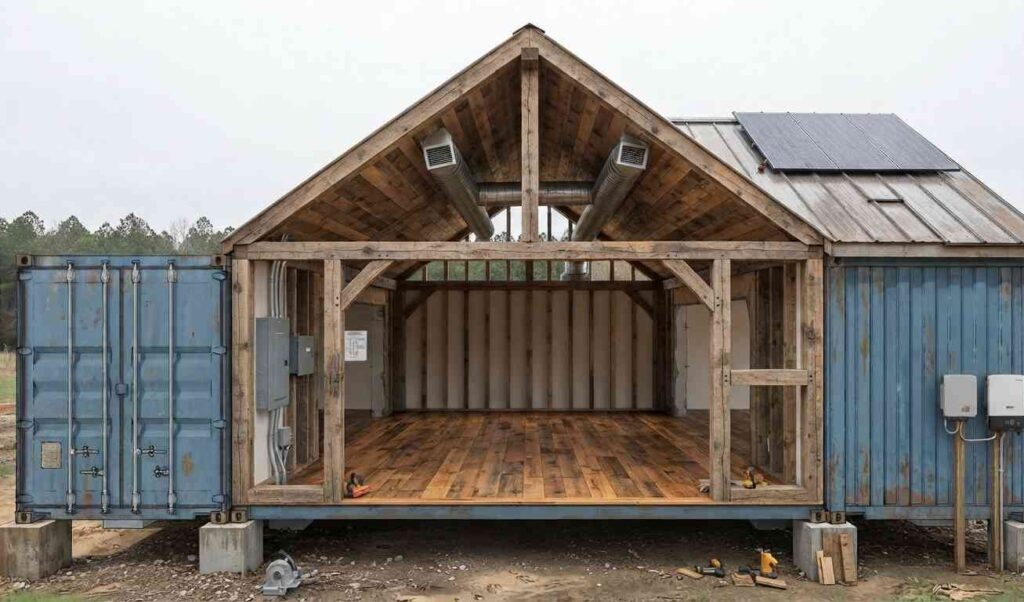
Two 40-foot containers set 14 feet apart create a gap that a wooden gable frame fills, turning two narrow 7-foot-8-inch interiors into a spacious central great room. The pitched metal roof over the framed gap adds headroom and sheds water better than a flat-roofed container pair.
Because the gap is spanned, you need both metal fabrication for the roof panels and conventional carpentry for the studs, so the build loses the all-modular, drop-in simplicity. The framed roof is easy to insulate and leaves a central cavity for HVAC ducts and wiring.
A practical tip: pre-drill all wall studs for conduit before raising the roof, then pull the lines through the cavity to avoid later cuts. This layout works well for a roughly 30-by-40-ft footprint (about 1,200 sq ft); DIY-savvy owners can handle framing, but a licensed roofer should install the metal panels.
- Wider living area
- Better roof drainage
- Requires two trades
- More coordination needed
Pre-drill studs for conduit before the roof lift.
- Gap width: 12 to 16 ft
- Roof pitch: 6:12
- Insulation: R-19 batts fit easily
3. The Single 40-Foot High-Cube Linear Studio
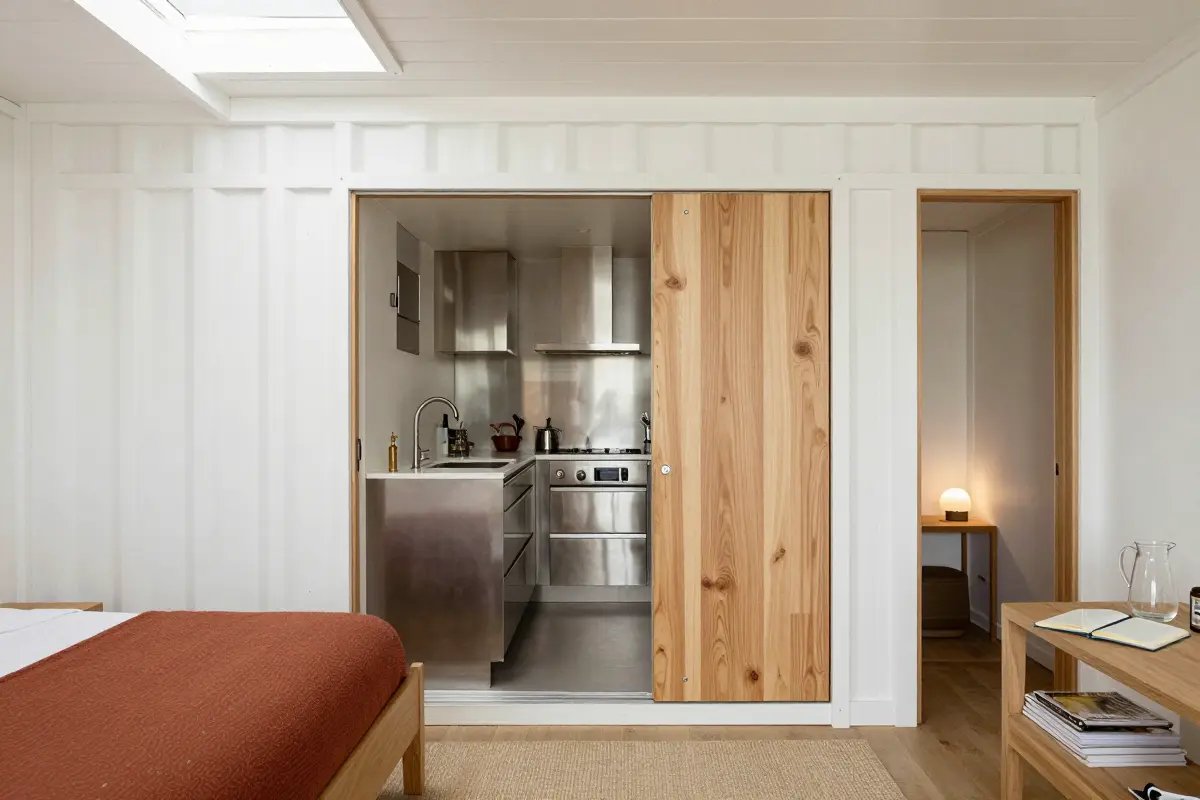
A high-cube container’s 9.5-foot exterior height leaves far more headroom than a standard 8.5-foot container once the floor, walls, and ceiling are insulated: roughly 8 ft 10 in of clear height inside, versus about 7 ft 10 in. The layout runs the galley kitchen and wet bath down the center, with a low-profile bed at one end and a compact living nook at the other, preserving a clear floor run for wheelchair or stroller clearance.
Built-in pocket doors slide into the wall to keep the narrow width open, but the single circulation spine means privacy between the two zones is limited. If you need more separation, a side-by-side two-container plan or a split-level loft offers a better solution.
This design shines for solo artists, remote workers, or tiny-home renters on narrow urban lots, with a footprint of just 320 sq ft (40 ft by 8 ft). For more small-space loft ideas, see our practical tiny loft concepts.
- Extra headroom
- Efficient footprint
- Minimal privacy
- Limited storage depth
Overhead shelves can reduce standing headroom and feel cramped.
4. The Staggered Cantilevered Two-Story Build
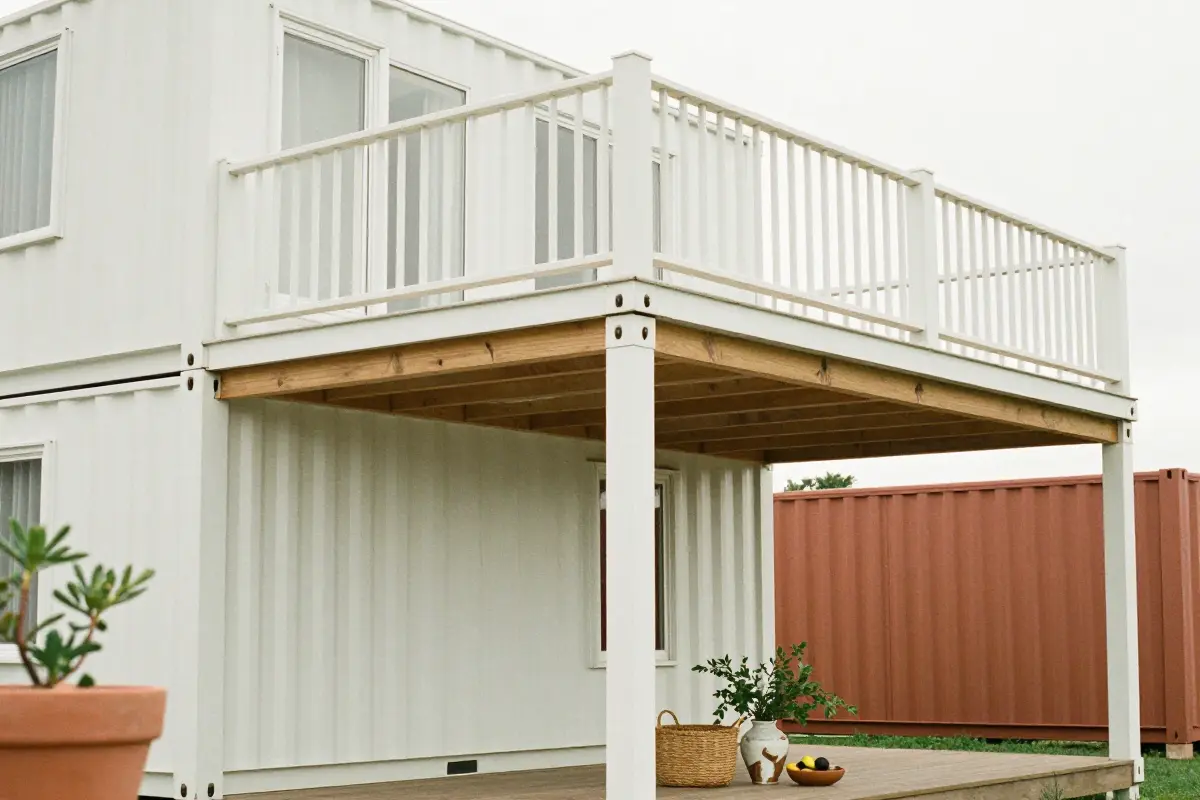
A staggered cantilevered two-story container shifts the upper box outward, often six to eight feet depending on the engineer’s design, creating a porch below and a walk-out balcony above. Because the overhang puts bending and torque loads on the supporting frame and corner castings, a structural engineer must design heavy-duty reinforcement beams and load-bearing posts.
A crane is required to lift the overhanging unit into place; underestimating rental fees is a common budget pitfall. The design delivers dramatic interior volume and a striking exterior profile, but the engineering complexity and crane costs add significant expense.
Most homeowners will need a professional contractor; DIY assembly is rarely realistic for this scale. Before sealing, apply self-adhesive flashing tape along the exposed seam where the lower roof meets the upper container to prevent water intrusion.
- Dramatic interior volume
- Striking exterior profile
- Complex engineering
- High crane cost
- Estimated cost: roughly $150,000 to $200,000, varying with site work, engineering and crane rental (get local quotes)
Cutting or welding near corner castings without an engineer’s sign-off can compromise the container’s structure.
5. The U-Shaped Three-Container Family Floor Plan
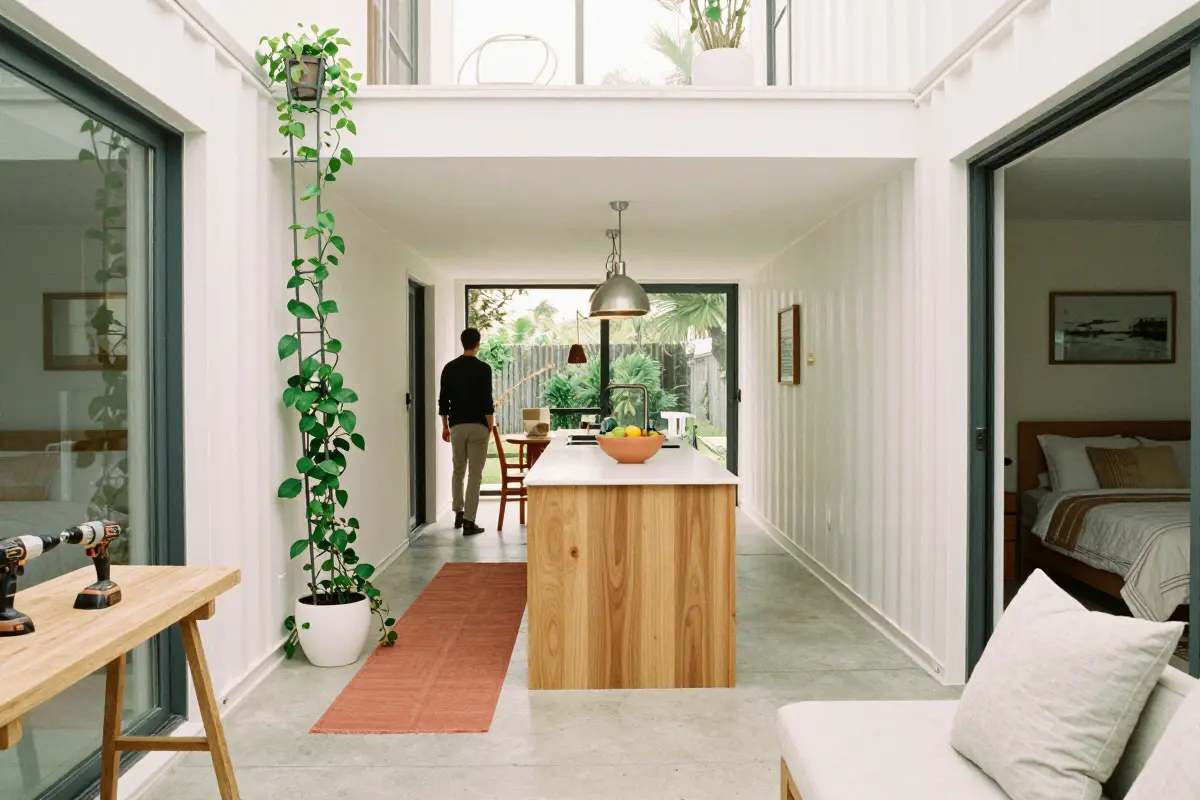
The primary bedroom occupies the left arm of the U, while two smaller bedrooms nest in the right arm, all opening onto a central courtyard. The connecting container forms a linear kitchen-dining corridor that links the wings, keeping cooking traffic separate from private sleeping zones.
Steel conducts heat so well that every wall and seam is a thermal bridge. Continuous exterior rigid insulation, with a vapor control layer suited to your climate, stops heat loss far better than insulating only between interior studs. The layout suits families on a lot of roughly 60 by 80 feet (setbacks permitting) who want clear child and adult zones.
DIY framing is doable, but hiring a certified welder and an insulation contractor avoids costly rework.
- Efficient three-bedroom layout
- Central outdoor space
- Large footprint required
- Requires meticulous thermal break
Install rigid foam on the exterior before interior finishes to maintain continuous insulation.
6. The Split-Level Container Home on a Sloped Site
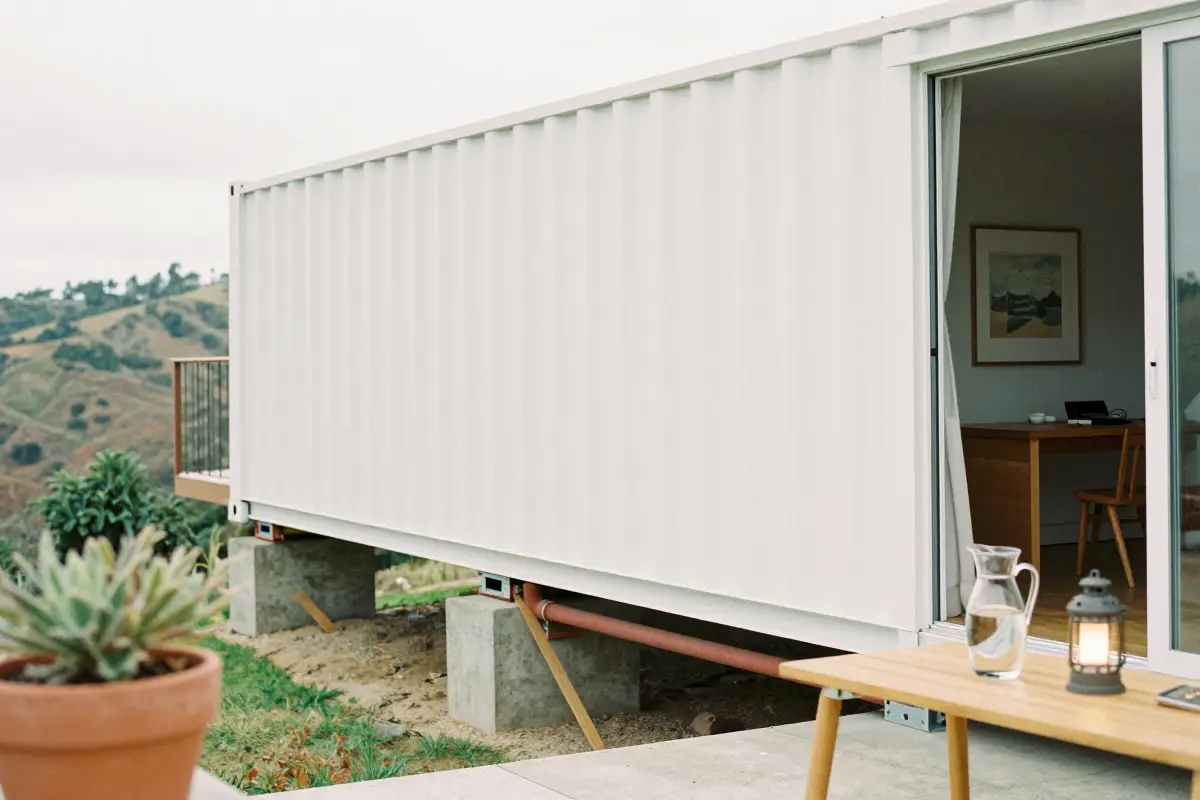
Uneven hillside grading forces costly excavation and massive retaining walls that can add significantly to a container home’s budget.
A split-level design drops two 40-ft containers down the slope on concrete piers with welded baseplates, eliminating the need for a full-length slab foundation. Each pier’s depth must be engineered for the specific grade and soil, and drain lines must be planned for each level so waste pipes keep their slope.
If crane access is limited or soil conditions are poor, a ground-level container on a slab may be simpler. Steel walls still need periodic rust checks; a mild-steel cleaner and a rust-inhibiting primer keep the exterior durable.
Tip: use a laser level to set pier heights before pouring, ensuring a level floor across both levels and reducing later shimming.
- Saves excavation cost
- Reduces concrete use
- Requires custom pier design
- Complex multi-level plumbing
Laser-level the pier tops for a uniform floor height.
7. The Single 20-Foot Minimalist Backyard ADU
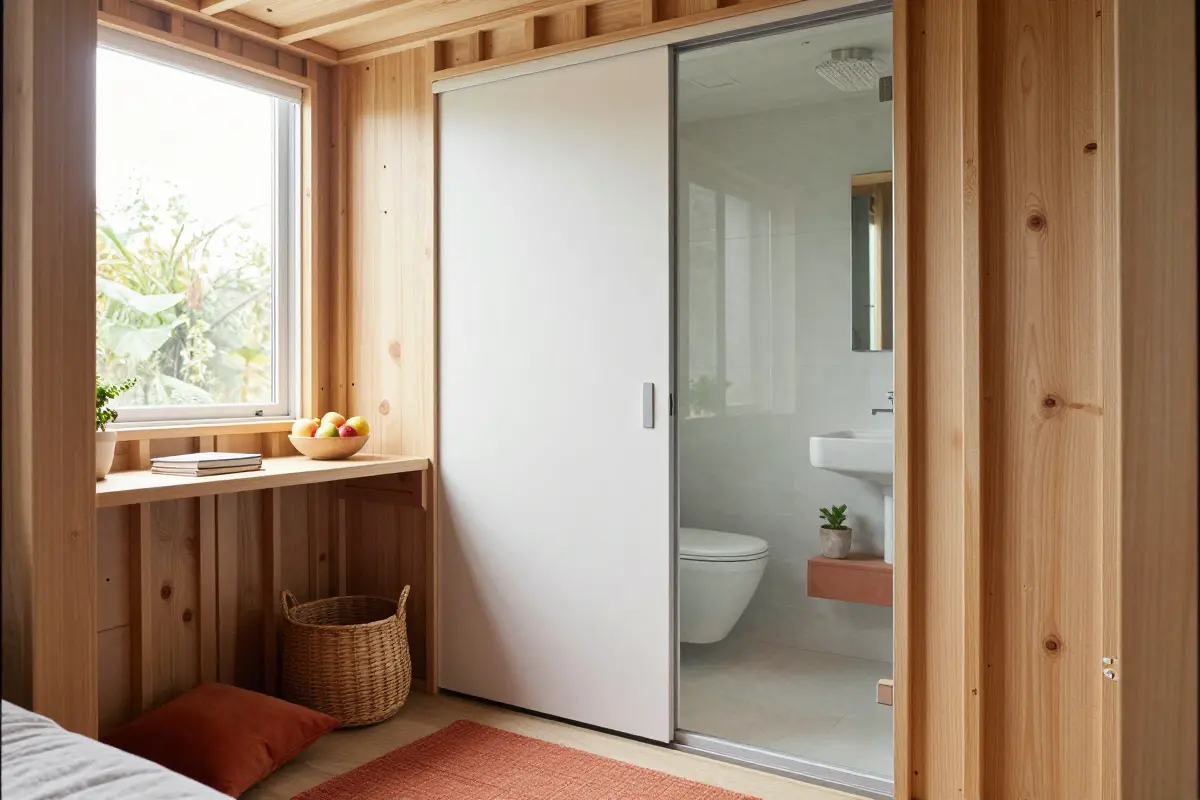
A 20-foot container is only about 8 ft wide outside and 7 ft 9 in inside, so any misstep in wall thickness instantly cuts floor area. A European-style wet room stacks the toilet, shower and sink in a single 3-ft by 5-ft space, eliminating a separate dry powder room and preserving precious linear wall space.
Use 2-inch closed-cell spray foam to fill the cavity between the steel skin and interior framing; it adds insulation without eating much of the already tight 150 sq ft interior. Choose a sliding door instead of a standard swinging door to keep the full interior width clear for a work desk or fold-out guest bed.
This setup suits homeowners who need a backyard office or guest ADU on a small lot and can afford custom millwork for built-in storage. Check your local ADU rules for size, setback and utility requirements before you buy a container.
- Efficient use of space
- Compact footprint
- Zero margin for error
- Custom millwork cost
- Interior length: 19 ft 4 in
- Interior width: 7 ft 9 in
- Interior height: 7 ft 10 in
Swinging doors waste usable width in a container this narrow.
8. The Offset Stacked Duplex with an Exterior Steel Staircase
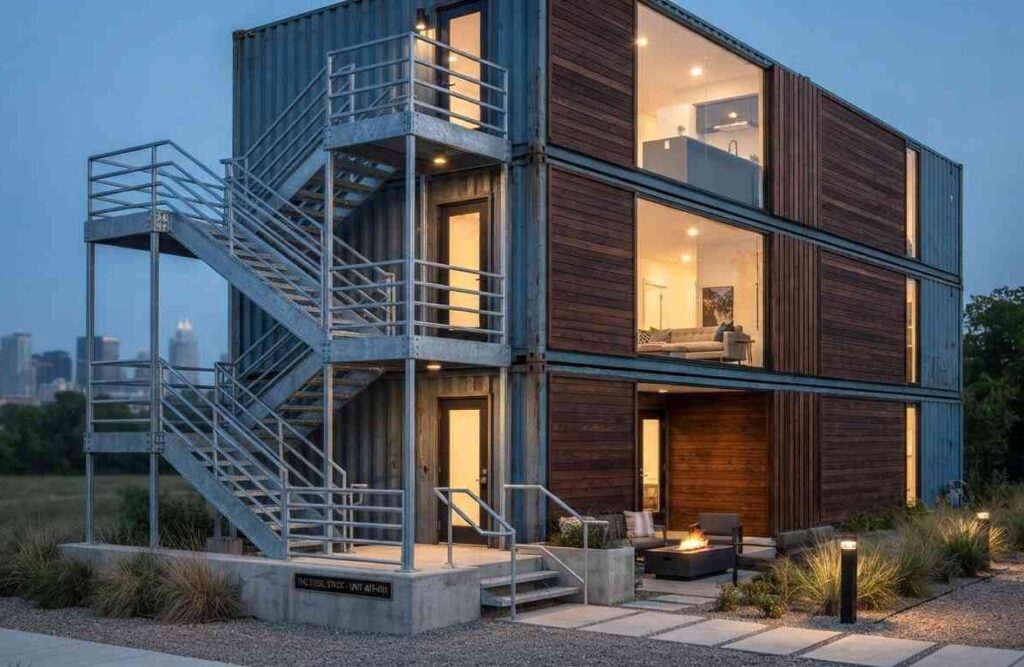
A galvanized steel staircase wraps around the container’s exterior, giving each unit its own entry without carving interior space for a flight of stairs. Interior stairs can eat a large share of floor area and add framing costs, while an outdoor steel stair saves that square footage and usually costs less to install.
The design fits investors seeking two rental units or families needing separate living zones. Building code officials commonly require a fire-rated separation between units and sound control, such as fire-rated drywall and acoustic underlayment.
Exterior stairs also mean residents face rain or snow, so a weather-resistant finish is essential. A pre-fabricated stair kit can be bolted together by a competent DIYer, but stairs are a life-safety element: confirm rise, run, handrail, and landing rules with your building department, and let a licensed contractor handle the fire-separation walls and permit verification.
- Extra rental income
- Separate entrances
- Fire-separation cost
- Weather exposure on stairs
- Galvanized steel stair kit
- Acoustic underlayment
- Fire-rated drywall
- Permit check
9. The Wide Side-by-Side Double-Wide Cutout Plan
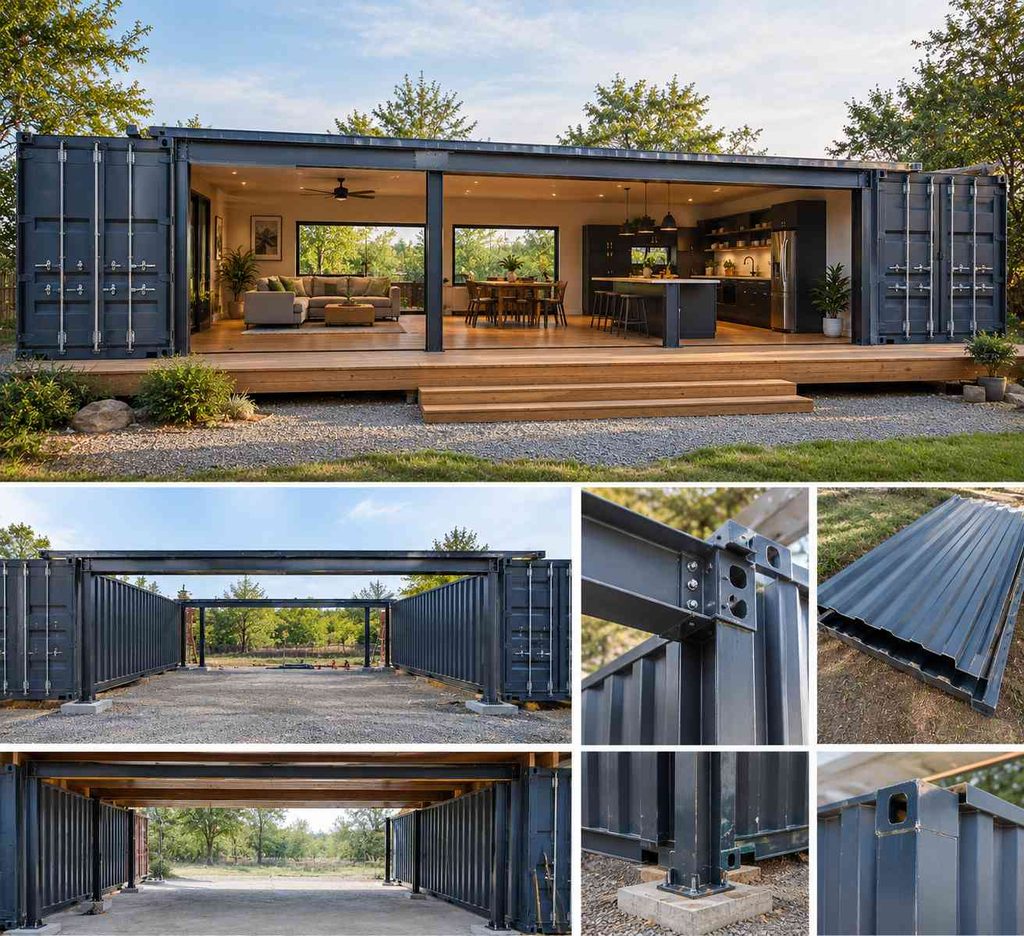
The corrugated steel siding on the long walls of two 40-foot containers is cut away to create a roughly 16-foot-wide open-plan space. After the containers are leveled, anchored, and joined, the opening is framed with steel beams sized by a structural engineer and supported by posts at each end, restoring the strength the cut walls removed.
A common mistake is to slice the steel before the frame is squared and secured, which can warp the remaining structure and require costly rework. Preserve the cut panels for an exterior fence or window shutters to recoup material costs.
Most homeowners should hire a certified welder, and a structural engineer should specify the beam sizing; the precise welding tolerances make a true DIY effort risky.
- Spacious open layout
- Strong structural solution
- Requires expensive steel beams
- Needs professional welding
Cutting walls before the containers are leveled, joined and braced can warp the frame.
10. The Hybrid Container Core with Stick-Built Living Additions
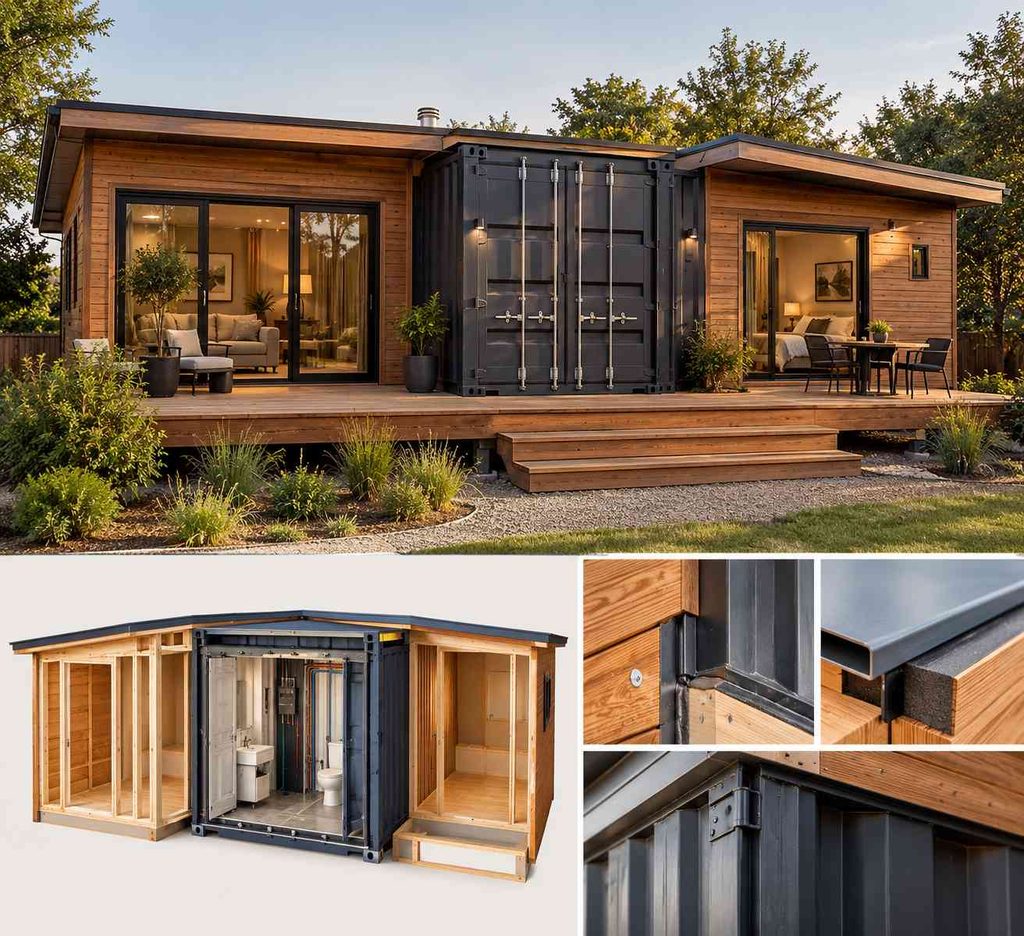
A single container can act as a compact utility hub, while stick-built rooms wrap around it for spacious living. The steel shell can hold the plumbing, electrical panel, and bathrooms, and if it is fitted out off-site, those systems arrive pre-routed and tested.
Wood framing then attaches to the corrugated sides, but the connections need flashing and a flexible sealant; steel and wood move at different rates with temperature and moisture, and rigid joints will eventually open gaps and leak.
If the flashing step feels too technical, consider a full timber frame with a small prefabricated bathroom pod instead of a whole container core. The steel core resists rot and needs only occasional rust-spot cleaning, while the wood sections require standard siding upkeep.
A practical tip: install a continuous flashing strip with an insulating thermal break at each steel-to-wood junction and seal it with a high-movement sealant to stop thermal bridging and water intrusion.
- Pre-routed utilities simplify installs
- Wood adds warmth and flexibility
- Requires specialized flashing
- Differential movement can cause leaks
Use flashing and a flexible, high-movement sealant at every steel-to-wood joint.
Frequently Asked Questions
Is it cheaper to build a house out of shipping containers?
Sometimes, but not always. A simple single-container build can come in somewhat cheaper than conventional construction, while complex multi-container designs that need heavy steel reinforcement and specialized insulation typically cost about the same as, or more than, standard building.
How much does it cost to build a shipping container house?
As a rough guide, a DIY single-unit studio often runs $30,000 to $60,000, while professionally built multi-container homes typically run $150,000 to $275,000 depending on site work, finishes, and region.
What are the main downsides of a shipping container house?
The primary disadvantages are narrow finished interior widths of under eight feet after framing and insulation, complex local permitting approvals, and high vulnerability to thermal transfer without continuous insulation.
Do you need a permit to build a shipping container home?
Yes, in nearly all jurisdictions. A container home must meet the same zoning, building, and energy codes as any other house, and many areas also ask for engineered plans for wall cuts and foundations. Check with your local building department before you buy a container.