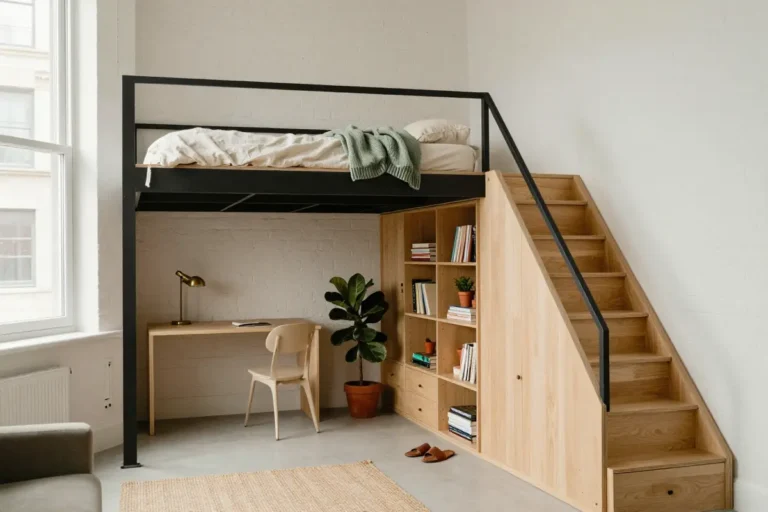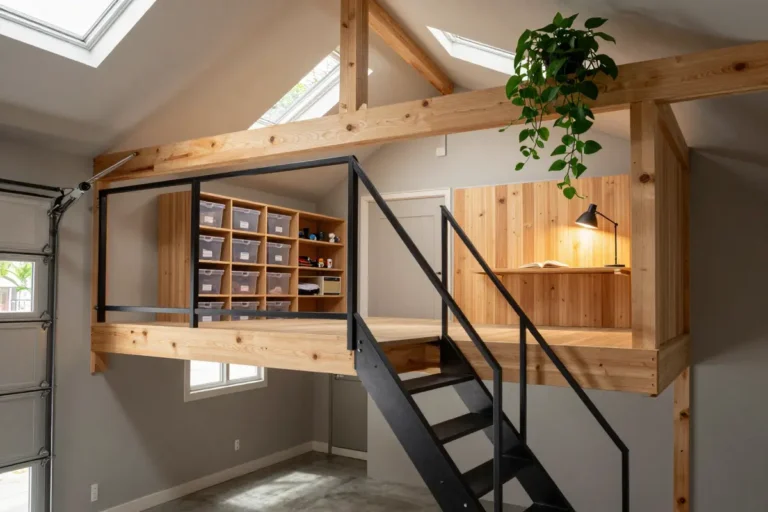
10 Modern Garage Loft Ideas for Storage, Workspaces, and Living
A garage loft only works if you have the headroom, so measure before you design. Most garages offer 8 to 10 feet of clear height, which is enough for overhead storage but rarely enough for a standing-height loft above a parked car. That number decides what you can actually build.
Height matters more than the sleek render you saw on a design board, because the loft’s floor structure, railing, and the space above it all have to fit inside the same volume. Load limits and local codes shape the rest: what the joists can carry, whether the space counts as habitable, and whether you need a permit.
The ten ideas below all respect those limits. They range from a steel-framed mezzanine with matte black railings to a monochromatic charcoal loft lit by LED channels, and each shows how to turn overhead space into storage, a workshop, a gym, or a quiet lounge without guessing at headroom or load.
1. Industrial Steel-Framed Mezzanine with Matte Black Railings
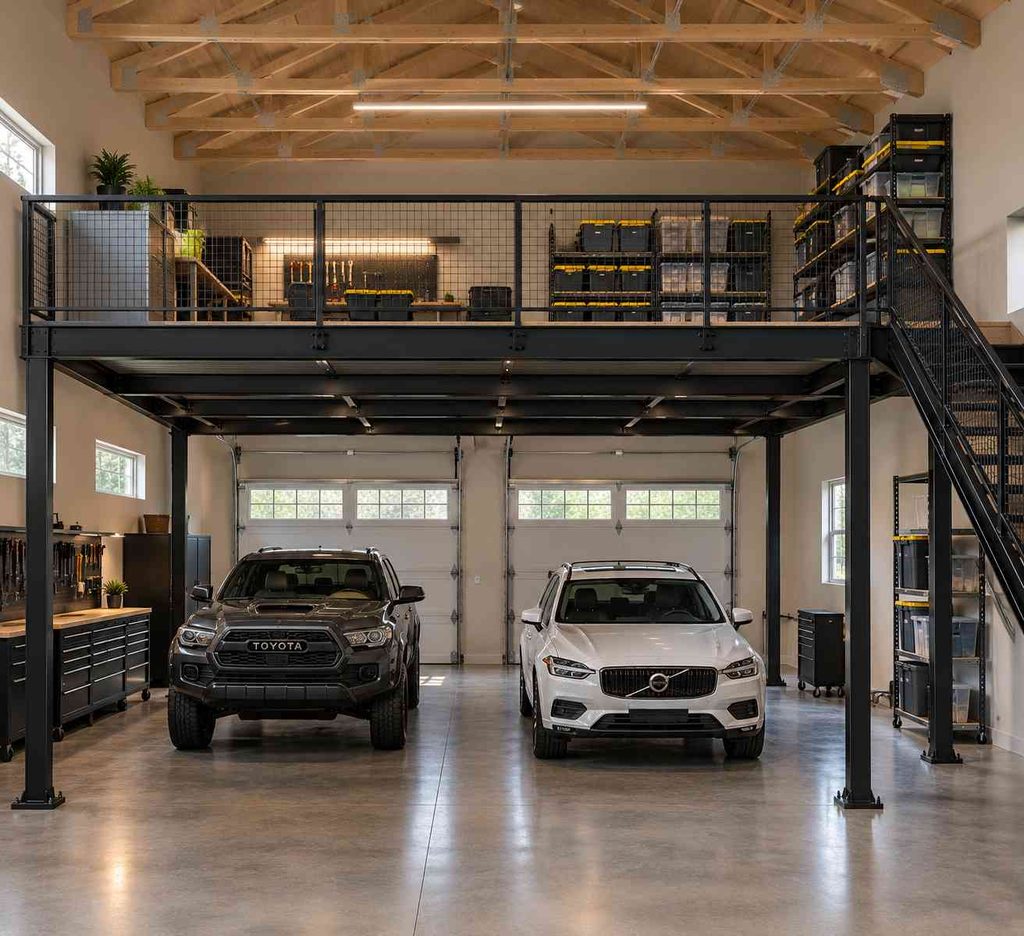
Powder-coated black square tubing gives the mezzanine a sleek, industrial vibe while it stands on freestanding steel posts. Bolt-together kits carry the load on their own posts without touching the ceiling joists, which protects the roof trusses. Load ratings vary widely between kits, so ask for the engineered load table before you order.
For a cleaner look, custom-welded frames can replace the bolts, but they add fabrication time and cost. Choose steel mesh rail panels for a light feel or cable rails for a modern edge.
A timber loft is cheaper and easier to modify, but it needs more posts or heavier framing and lacks the industrial look. DIY is feasible on a sound concrete slab, but a steel fabricator ensures proper welds and load testing.
Before ordering, verify the slab is at least 4 inches thick and in good condition, and have an engineer confirm it can handle the point loads under each post.
- High load capacity
- Preserves roof trusses
- Consumes perimeter space
- Requires slab verification
An undersized or cracked slab under the posts can lead to cracking or settlement.
2. Minimalist Birch Plywood Decking with Slim Tension-Wire Rails
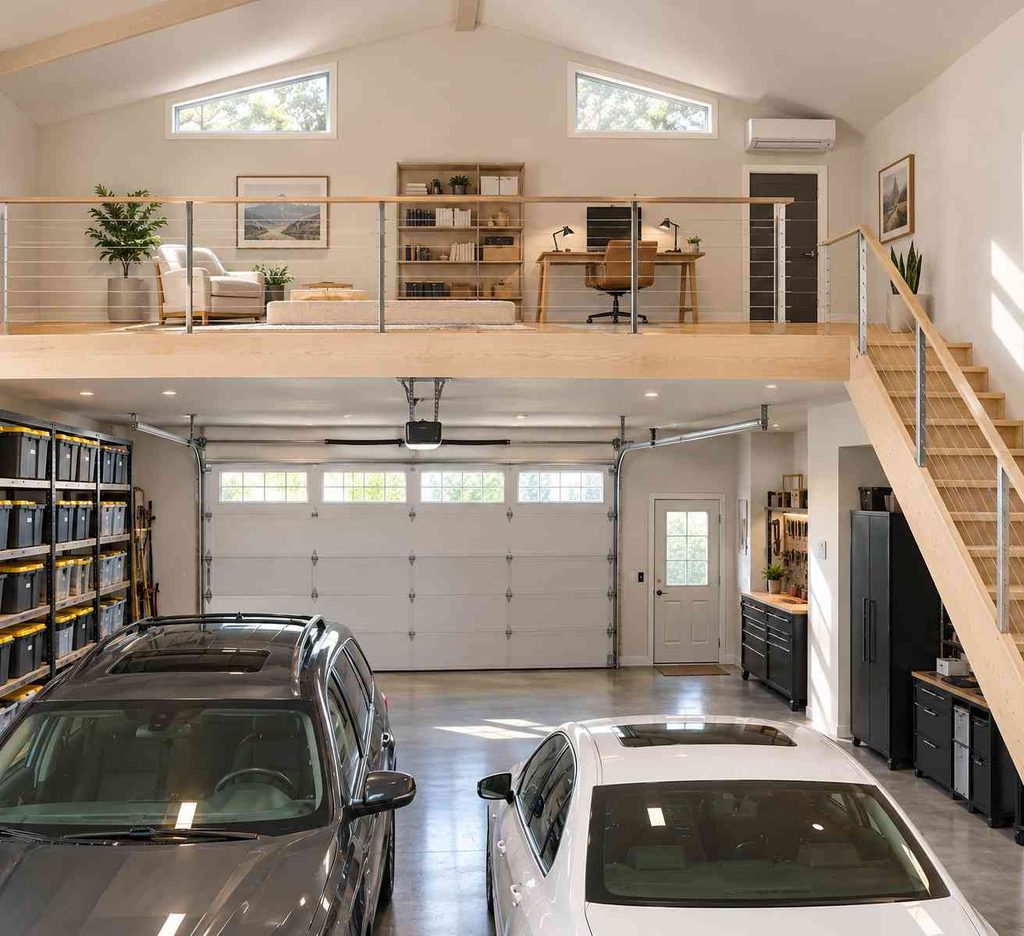
A light-colored birch deck runs the length of the loft, its smooth grain catching the garage’s filtered daylight and creating an airy, Scandinavian feel. Lay 3/4-inch Baltic birch or sanded cabinet-grade plywood on sturdy joists, then run thin stainless-steel tension wires along the edge for a rail that blocks totes without blocking the view.
Check your local code for guardrail height and opening size: openings generally must stop a 4-inch sphere, and cable rails need tight spacing and proper tensioning to meet that. Seal every plywood surface with at least two coats of polyurethane; this locks out moisture that otherwise causes the pale wood to yellow, warp, or split. Clean the deck with a damp microfiber mop and avoid abrasive cleaners that can lift the finish.
- Bright, airy look
- Easy visual continuity
- Requires diligent sealing
- Warps if not sealed
Apply polyurethane in a dust-free room, sanding lightly between coats for a smooth, durable finish.
3. Enclosed Climate-Controlled Loft Office with Clerestory Windows
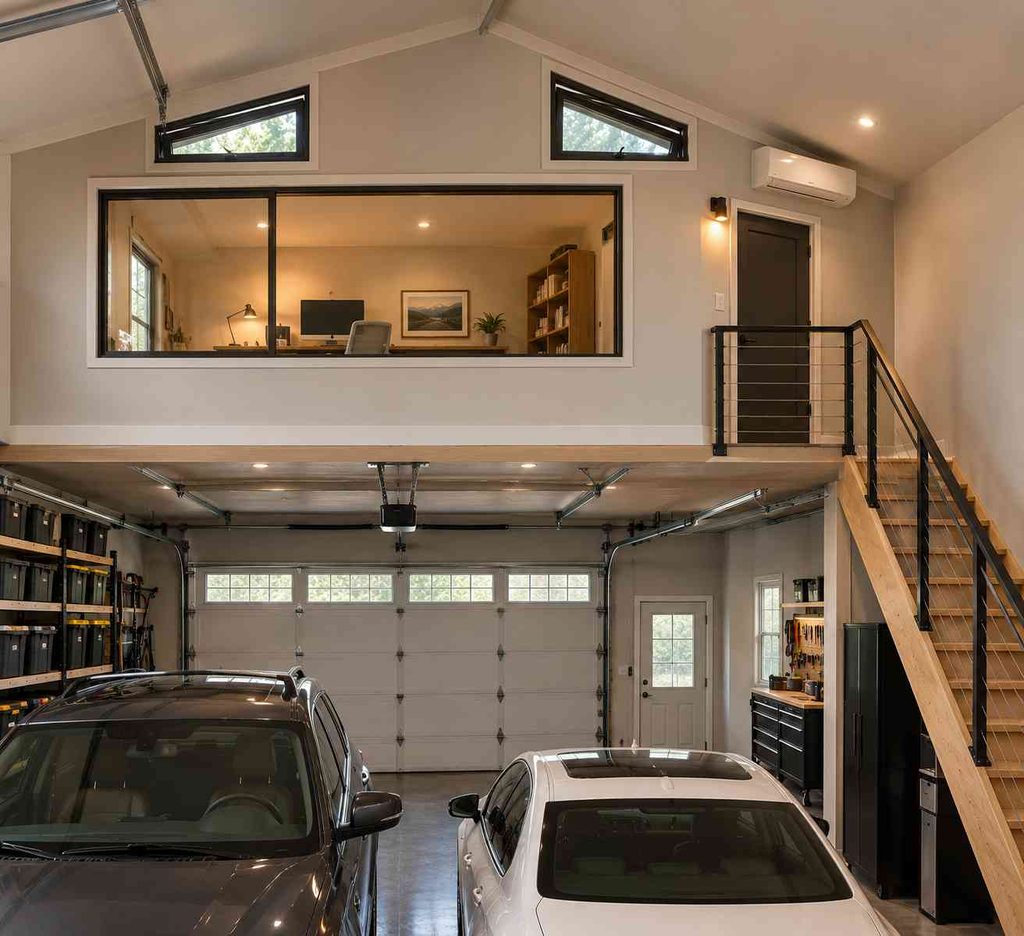
A sealed loft office perched over the garage keeps sawdust, exhaust fumes, and winter drafts out of the workspace. Build a full drywall envelope with mineral wool insulation, then install a mini-split unit for heating and cooling.
Add compact awning windows high on the gable wall to bring in daylight without sacrificing wall space. Building codes usually require a fire-rated separation between a garage and living space (commonly 5/8-inch Type X drywall on the ceiling) and a fire-rated, self-closing door; confirm the details with your local building department.
If the room will be used for sleeping, code typically requires an emergency egress opening of at least 5.7 sq ft, and a building permit is almost always required. This setup works best in a two-car garage of 400 to 600 sq ft, ideal for homeowners who need a quiet remote office.
Expect roughly $10,000 to $30,000 for a finished, climate-controlled loft office, and far more if you convert it to full ADU-level living space with plumbing. Plan on a professional contractor for the code-critical work.
- Quiet, dedicated office
- Protects equipment from garage contaminants
- High construction cost
- Strict code compliance required
Fire-rated separation and egress requirements must meet local residential code.
4. Cantilevered Perimeter Storage Platform for Unobstructed Floor Clearance
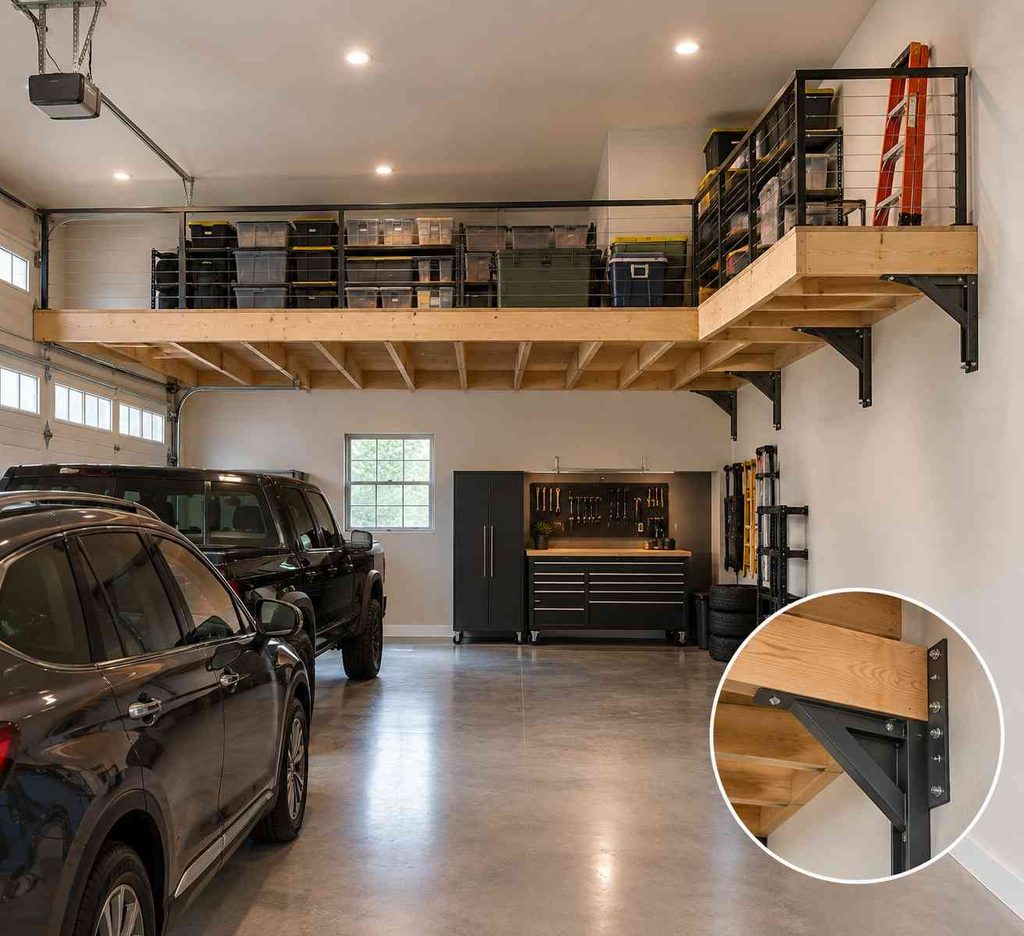
Tall vehicles and rolling tool cabinets often get trapped by floor-level posts in a garage loft. A wall-anchored cantilevered platform eliminates those obstacles by extending storage about 4 to 5 feet out from the perimeter, leaving the floor clear for cars and carts.
Have a structural engineer size the joists and fasteners, because a cantilever concentrates load on the wall. A typical build fastens engineered joists to a continuous ledger lagged into the wall studs, with diagonal steel knee braces for shear support. Keep the projection modest to limit deflection, and plan for light loads such as seasonal bins rather than heavy tools.
Do not rely on drywall alone; anchor only into studs or a structural wall. The system works best in garages 20 ft by 30 ft or larger, and while DIY-savvy homeowners can build it, an engineer should verify the loads.
- Unobstructed floor
- Flexible layout
- Limited depth of 4 to 5 ft
- Strict weight caps
Anchoring to drywall can cause platform failure.
5. Contemporary Slat-Screened Mezzanine Studio
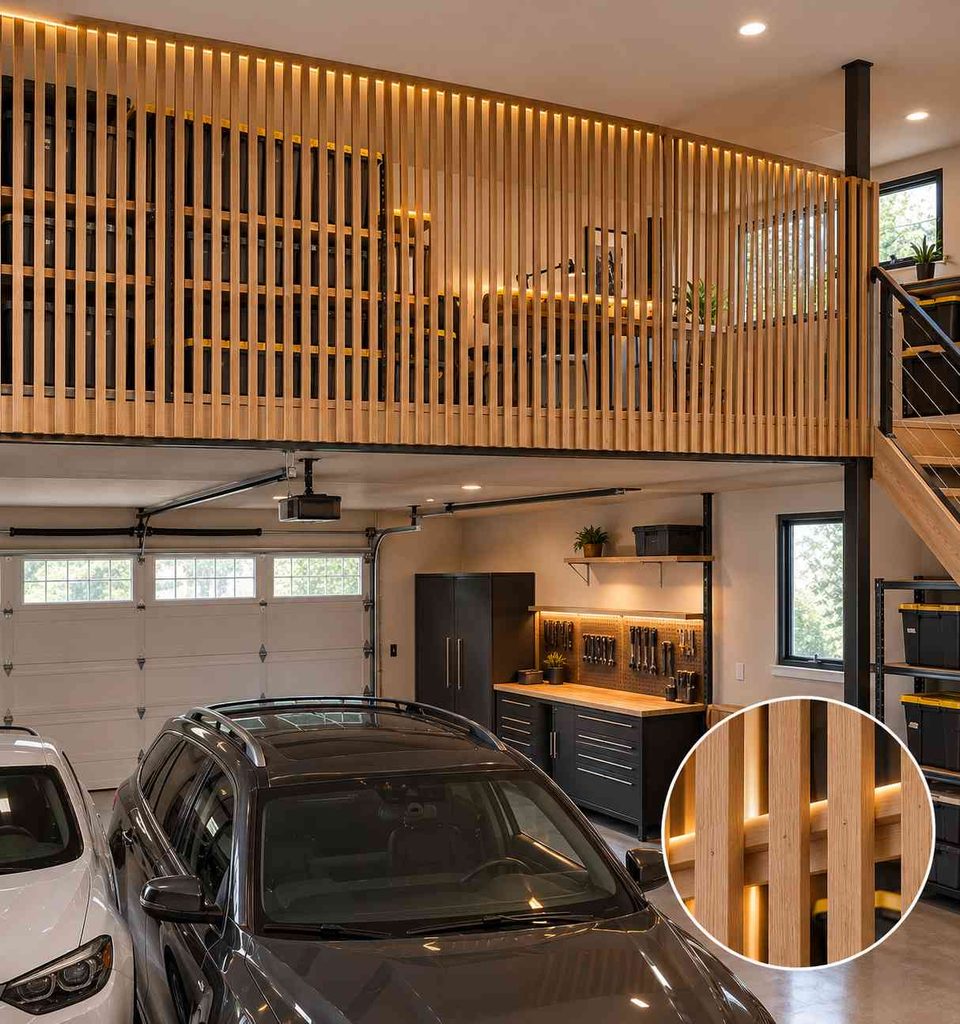
Floor-to-ceiling vertical oak slats create a sleek barrier for a garage mezzanine studio. The 1×2 boards hide stacked totes while still allowing airflow through the gaps.
Install low-voltage LED strips behind the slats for subtle lighting, and route the low-voltage wiring neatly behind the boards rather than leaving loose cords. Practical tip: cut all slats to the same height and mount a spacer rail so each board stays evenly spaced, reducing warping.
Keep humidity below about 55% with a dehumidifier; otherwise, the lumber can cup or twist. Oak tolerates dents and wipes clean with a damp cloth, so it suits year-round use.
- Modern visual appeal
- Airflow maintained
- Needs perfectly straight lumber
- Humidity-sensitive
Use a spacer rail to keep slats evenly spaced and reduce warping.
6. Low-Profile U-Shaped Walkway Loft for Tandem Garages
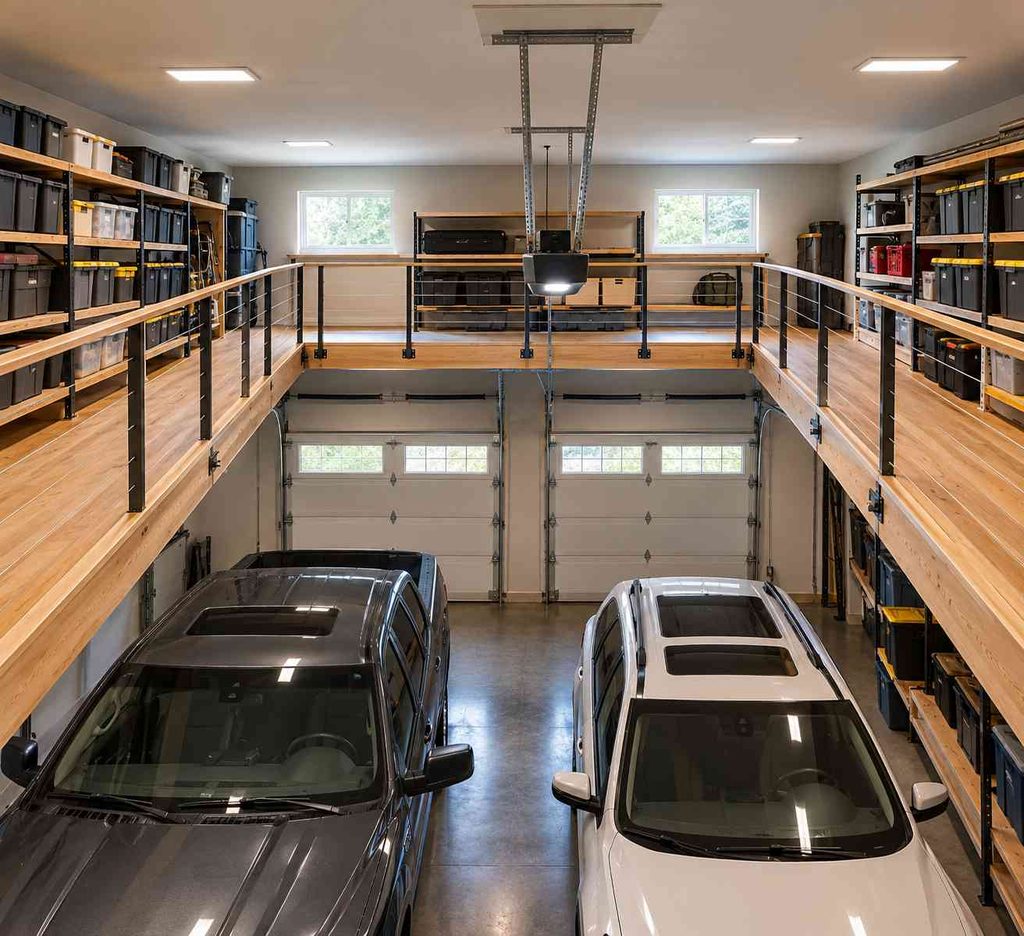
A low-profile U-shaped catwalk wraps the perimeter of a tandem garage, leaving the center clear for tall hoods and overhead door tracks. The 30- to 36-inch-wide walkway lets you pull bins from three sides without crouching or shifting stacks, and the open middle keeps ceiling height intact for a lifted vehicle.
Fasten joists to the garage walls, add 3/4-inch plywood decking, and install a guardrail at the height your local code requires (typically 36 to 42 inches). This design works best in a deep garage of roughly 20 by 40 feet, where storage matters more than a large, open loft.
If you need a spacious platform for a workbench or large workout gear, a full-width mezzanine loft is a better fit.
- Easy bin access
- Preserves ceiling clearance
- Limited floor space
- Cannot hold large items
- Catwalk width: 30 to 36 inches
- Headroom above catwalk: at least 6 ft 8 in; 8 ft is more comfortable
- Guardrail height: per local code, typically 36 to 42 inches
7. Dedicated Fitness and Yoga Loft with Interlocking Rubber Tile
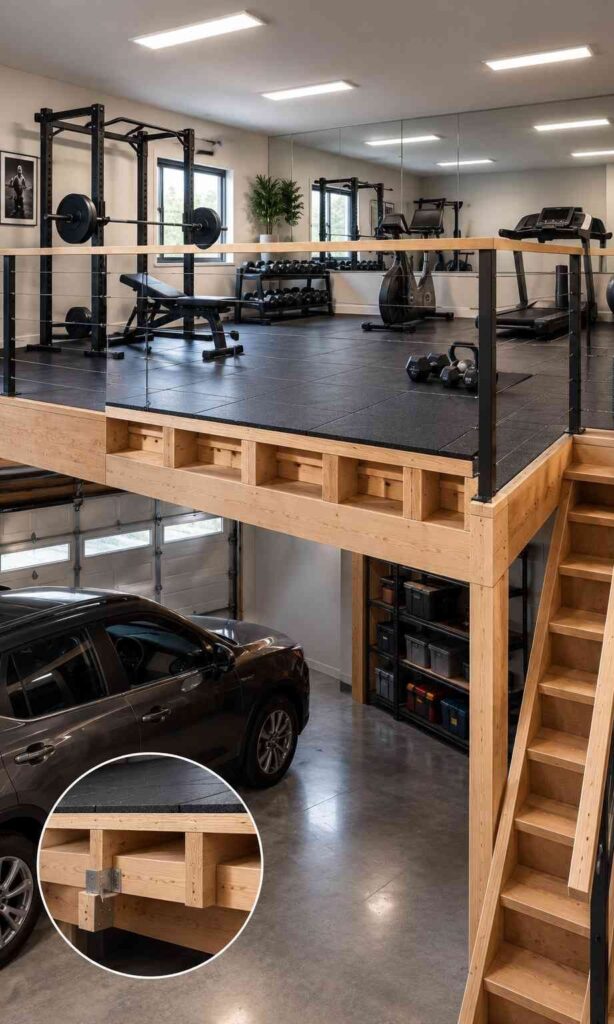
Weight-filled benches and dropped dumbbells can overload a standard garage loft floor, turning a workout zone into a safety hazard. A dedicated fitness loft solves this by installing high-density rubber tiles over a reinforced subfloor, then adding mirrored back walls and flush-mounted LED panels for light and motivation.
Homeowners with a two-car garage and at least 8 feet of clear height above the loft floor benefit most; the loft should span a minimum of 12 by 10 ft to accommodate a bench, squat rack, and cardio unit. Stiffen the floor by sistering the joists with additional lumber and adding solid blocking between them; without this, the joists will deflect under jumping or overhead presses.
Unless the framing was engineered for a gym, have a structural engineer review it before adding heavy equipment, especially if the joists are 2×8 or smaller.
- Strong floor for heavy gear
- Mirrors help check form
- Flush LED panels keep the ceiling clear
- Requires joist reinforcement
- Higher material cost
Improper reinforcement can lead to floor failure and damage to parked vehicles.
8. Woodworker’s Clean Craft and Assembly Loft Above Dirty Machinery
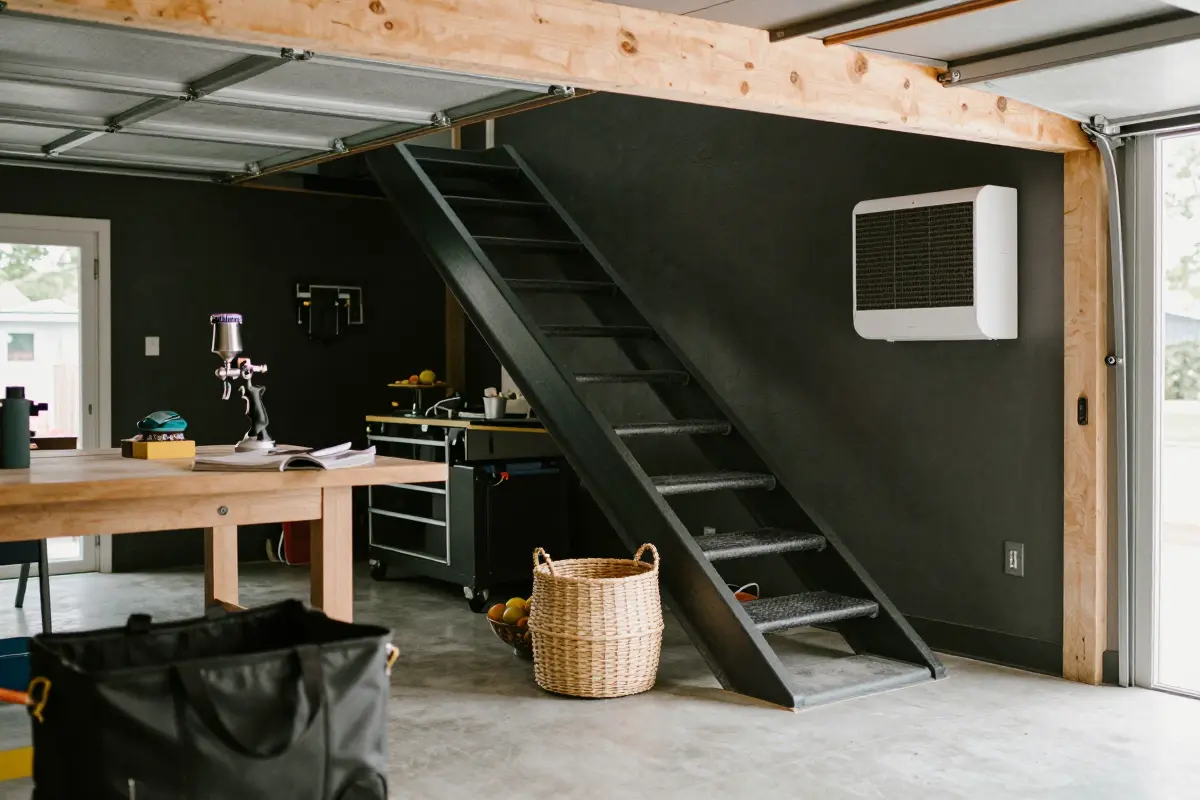
A loft can separate clean assembly and finishing work from the dust-producing machines below, but only if it is sealed properly. Build a solid, sealed plywood or hardwood floor over the machines, then seal all floor penetrations with gaskets for dust-collection ducts.
Run a HEPA air filtration unit in the loft while you sand or finish, and keep a properly ducted dust collector on the machines below. A drop-down stair with a gasketed hatch gives safe access and can be closed to limit dust migration when not in use.
The main drawback is that warm air carries fine particles upward, so without baffled stair openings and airtight ductwork, the loft can become a dust trap. This setup works best for serious woodworkers in a detached garage who need separate storage for dry lumber and a dedicated finishing station.
- Clean finish area
- Separate storage
- Dust rises without baffling
- Higher installation cost
Use sleeves with sealant around every duct penetration to maintain airtight seals.
9. Architect-Inspired Library and Lounge with Modern Alternating Tread Stairs

A sleek, dark-stained reading nook nestles beneath exposed rafters, its floor-to-rafter bookcases framing a low-profile sofa and a pair of brass-finished alternating-tread stairs that climb steeply to a mezzanine loft. These stairs take noticeably less floor space than a standard stair run, but they are much steeper and must be descended facing the stairs.
Warm recessed LEDs run along the ceiling joists, casting a soft glow over the shelves. Building codes limit where alternating-tread stairs may be used and often restrict them as a primary exit, so confirm tread, rise, width, and headroom requirements locally before you design around them.
If the steep climb feels unsafe, a conventional stair kit or a code-compliant fixed ladder can replace the alternating treads. Install a self-closing gate at the loft opening to prevent falls and keep pets out while you settle in with a good book.
- Space-saving
- Dramatic visual
- Steep descent risk
- Often not allowed as primary egress
- Slope: far steeper than a standard stair
- Typical use: access to a loft, not primary egress
- Requirements: tread, rise, width and headroom limits vary by local code
10. Monochromatic Charcoal Utility Loft with Integrated LED Channel Lighting
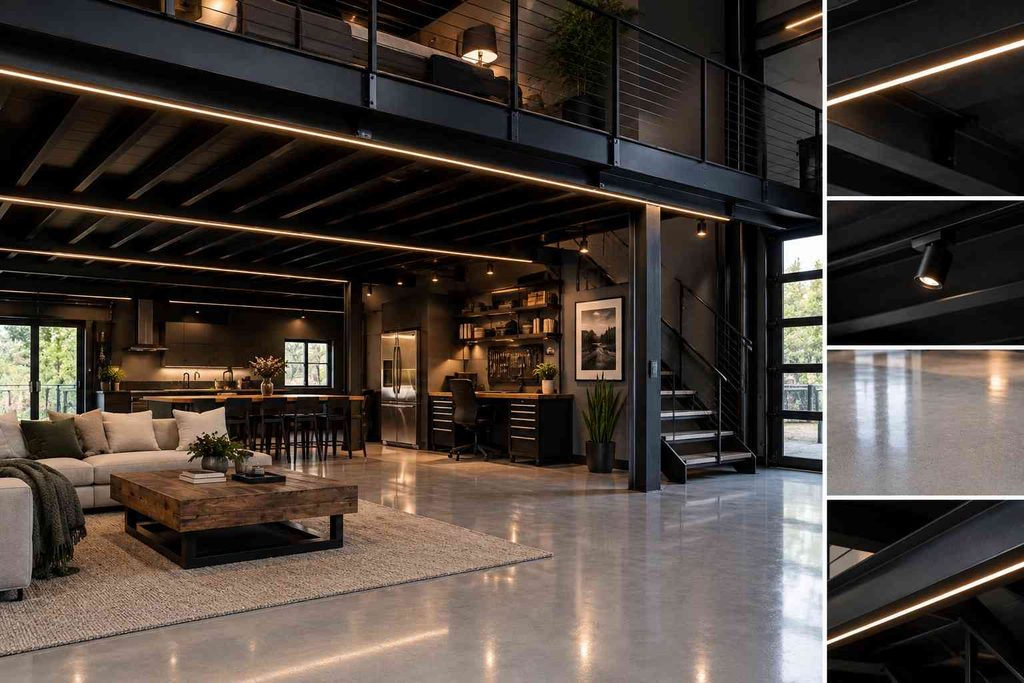
Coat the joists, beams, and decking in matte charcoal or black enamel, then embed flush-mount aluminum LED strip channels along the underside of the joist line. The uniform dark hides uneven framing and exposed conduit, while the linear light creates a crisp, modern silhouette.
Dark paint soaks up light, so choose LED strips delivering at least 300 lumens per foot and add spot-mounted task lights under the loft for work zones. For the floor, apply a scuff-resistant epoxy enamel in a light gray; it resists oil stains and can be mopped with a pH-neutral cleaner without dulling the finish.
A common mistake is under-specifying lumen output, which leaves shadowed bays and forces extra lamps later.
- Sleek, cohesive look
- Hides flaws
- Absorbs light, needs higher lumen output
- May feel heavy in small spaces
Use a low-VOC, epoxy-based floor enamel for durability and easy cleaning.
How to Frame a Basic Garage Loft Ledger and Joist System
This is the general sequence for a ledger-and-joist loft frame. Joist size, span, ledger fasteners, and any posts must come from an engineer or the span tables your local code accepts, and most areas require a permit, so treat the steps below as a guide to the process rather than a set of dimensions.
- Structural ledger, at least as deep as the joists and specified by your engineer
- Joist lumber sized for your span and load
- Joist hangers and structural screws or lag bolts specified for the connection
- Level, tape measure, and chalk line
- Carpenter’s square and drill
- Tongue-and-groove subfloor panels
- Locate the garage wall studs with a stud finder, then mark a straight line at the desired loft height, keeping at least 6 inches of clearance from the ceiling rafters.
- Pre-drill the ledger and fasten it to every stud with the specified lag bolts or structural screws, tightening until the ledger sits flush and cannot shift.
- Cut the joists to span from the ledger to the opposite support (a second ledger or a beam on posts), then set them on hangers at the specified spacing, checking each with a level before securing.
- Fasten each joist hanger with the specified structural screws, snug but not overtightened, which can split the wood.
- Lay the tongue-and-groove subfloor panels across the joists, tap them into place, and screw them down, leaving a thin gap for expansion.
The most common mistake is skipping the level checks on the joists, which leads to a wobbly floor. Double-check every joint before fastening.
More Garage and Loft Ideas
- 10 Practical Garage Loft Design Ideas for Storage and Living Space
- 10 Practical Tiny Loft Concepts That Actually Work in Small Spaces
- 12 Sophisticated Loft Ideas for a Modern Home
Frequently Asked Questions
What is the minimum ceiling height needed to build a garage loft?
A low overhead storage platform usually needs about 9 to 10 feet of clear height so you can still clear a vehicle and reach the shelf. A standing-height loft over parked cars generally needs around 14 to 15 feet, because you need vehicle clearance below plus roughly 7 feet of headroom above.
Can standard garage roof trusses support the weight of a loft?
No. Standard prefabricated roof trusses are engineered solely to support the roof deck and light ceiling drywall, so a loft must be supported by an independent structural ledger, dedicated posts, or floor joists engineered for live loads. Never hang or load a loft from the trusses without an engineer’s approval.
How much does it cost to build a modern garage loft?
As a rough guide, a basic DIY timber storage platform costs about $600 to $1,800 in structural lumber and fasteners, while a fully finished, climate-controlled office or living mezzanine typically ranges from $10,000 to $30,000 depending on finishes and permits.
Do you need a building permit to add a loft inside a garage?
A building permit is almost always required if the loft creates usable living or working floor area, alters load-bearing walls, or involves adding electrical circuits or plumbing lines.