10 Practical Tiny Loft Concepts That Actually Work in Small Spaces
10 Practical Tiny Loft Concepts That Actually Work in Small Spaces
When the ceiling feels lower than the floor, the first thing I check is whether a loft can actually fit without turning the room into a cramped crawlspace.
A low-clearance mezzanine platform with built‑in storage drawers can add a sleeping zone while keeping headroom for the space below, and it works in apartments where every inch counts.
The list rounds out with clever workstations under semi‑enclosed lofts, pocket‑door box lofts with hidden wardrobes, corner wedge platforms, double‑sided storage stairs, renter‑friendly tension‑pillar modules, and split‑level decks that double as sunken lounges, all ideas you can adapt to the real dimensions of your home.
1. Low-Clearance Mezzanine Platform with Sub-Bed Storage Drawers
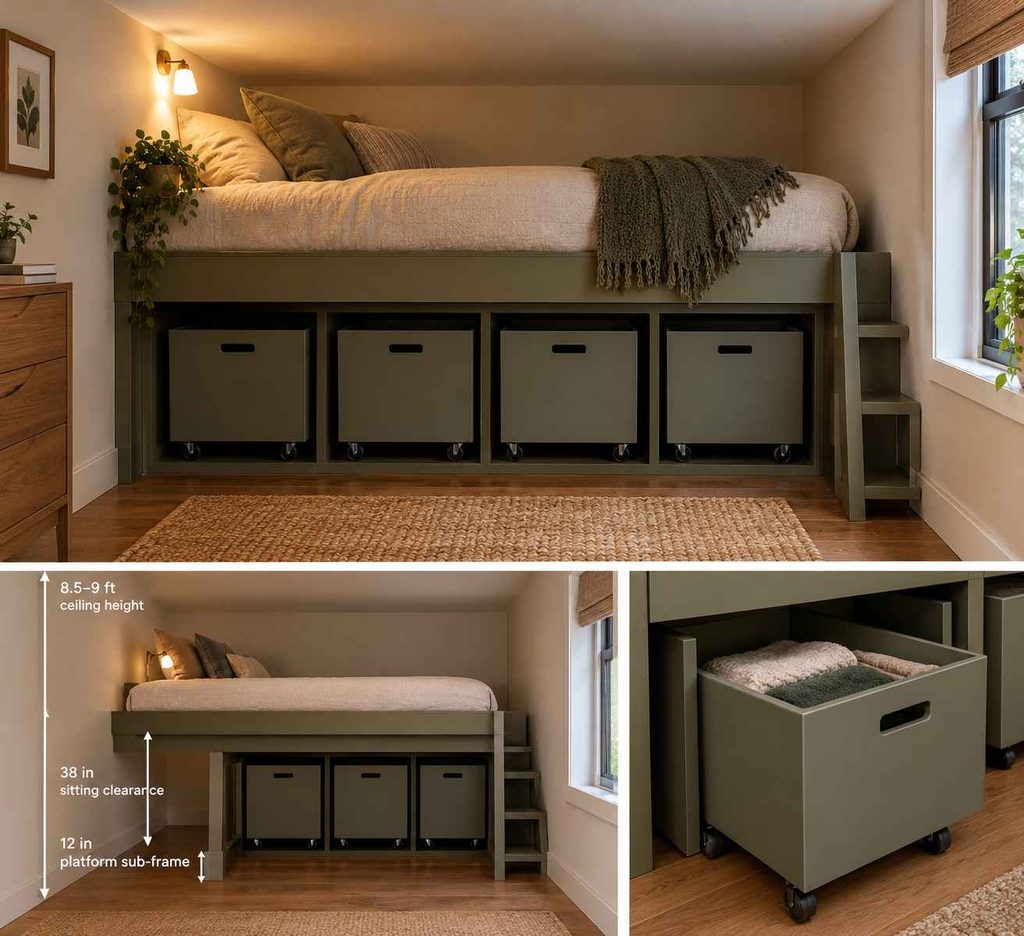
A ceiling under 9 ft leaves little room for a full‑height loft, so a low‑clearance mezzanine platform is the workaround. Build a 12‑inch sub‑frame that sits on the floor and supports a 38‑inch sitting headroom on top; the space beneath becomes a row of deep rolling storage bins.
Test a mattress no thicker than 6‑8 inches; any thicker pushes the head against the ceiling and feels cramped. The design fits studio apartments, small master bedrooms, or teen lofts where floor area is at a premium, and most DIYers can assemble it with basic carpentry tools; a contractor isn’t required unless you need code‑approved joists.
- extra storage
- higher sleeping level
- limits mattress thickness
- reduced headroom
- Ceiling height: 8.5‑9 ft
- Platform sub‑frame: 12 in
- Sitting clearance: 38 in
Use recessed drawer pulls so legs don’t snag on hardware
2. Floating Plywood Reading Loft Mounted Over a Closet Nook
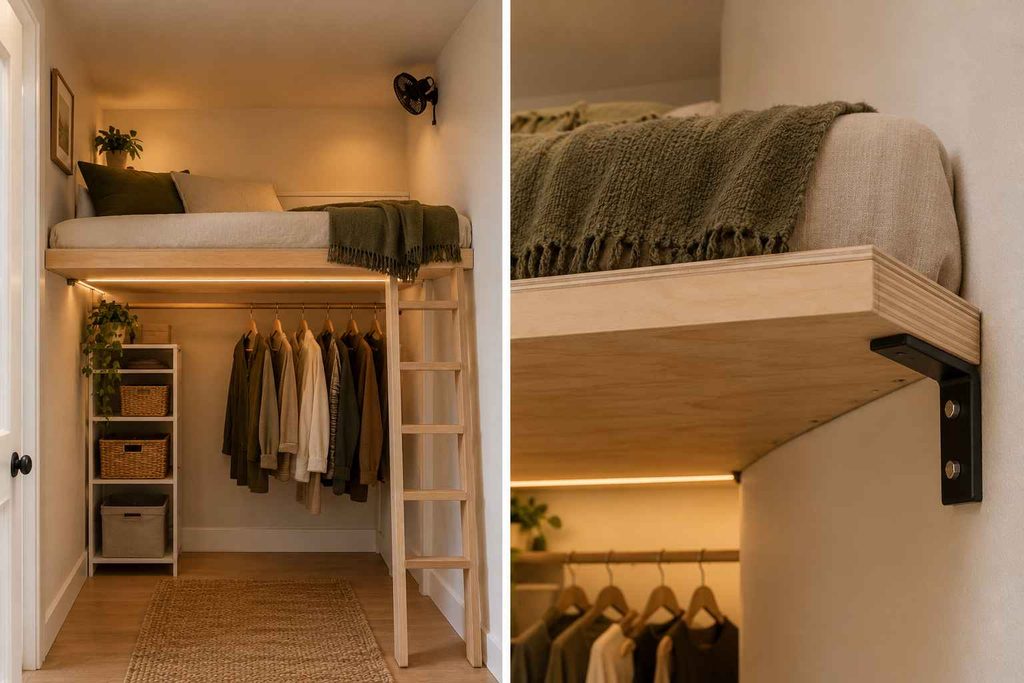
3/4‑inch birch plywood forms the deck of the reading loft, spanning a 5‑foot closet opening. Attach two 2×4 joist brackets to the wall studs with lag bolts, then rest the plywood on the brackets in a cantilevered layout.
Secure the front edge with a concealed metal cleat to keep the platform steady. A small wall‑mounted clip fan mounted near the upper corners prevents the common heat‑trapping issue that makes enclosed lofts uncomfortable.
This solution works best in small apartments or tiny homes where a dedicated reading nook is needed, and the permanent joist anchors suit owners who can modify walls; renters can opt for removable brackets that clamp to studs without drilling.
DIY‑savvy builders can finish the project in a weekend, but a licensed carpenter should verify load capacity for heavier users.
- Adds cozy loft space
- Utilizes dead closet area
- Traps warm air without ventilation
- Requires precise stud location
Improper lag‑bolt placement can weaken wall support
3. Steel-Framed Half-Loft with Alternating-Tread Stairs
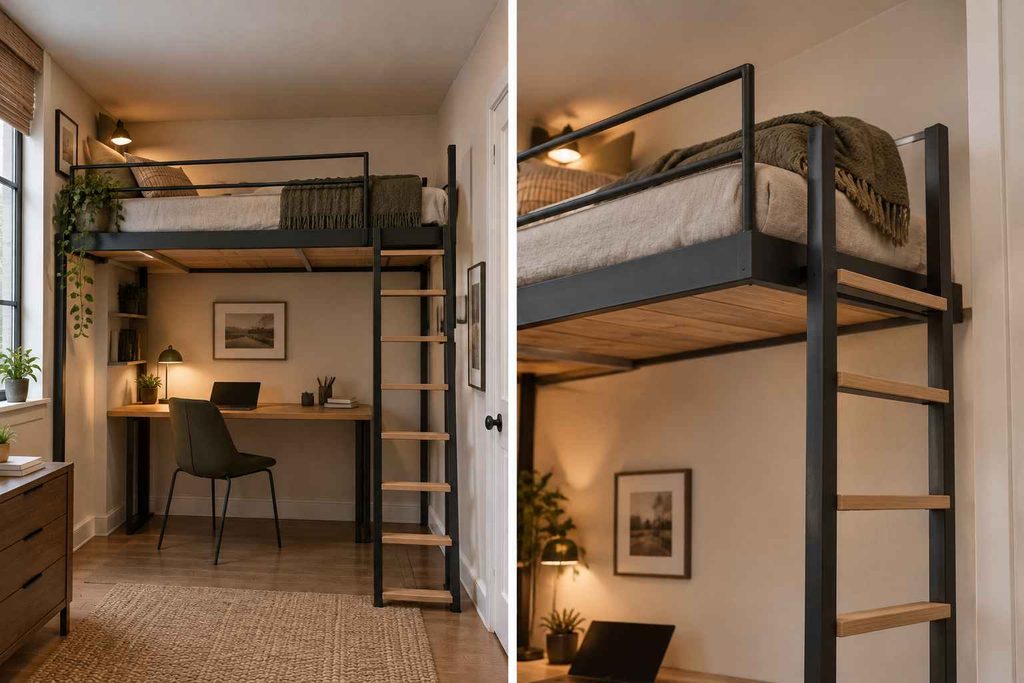
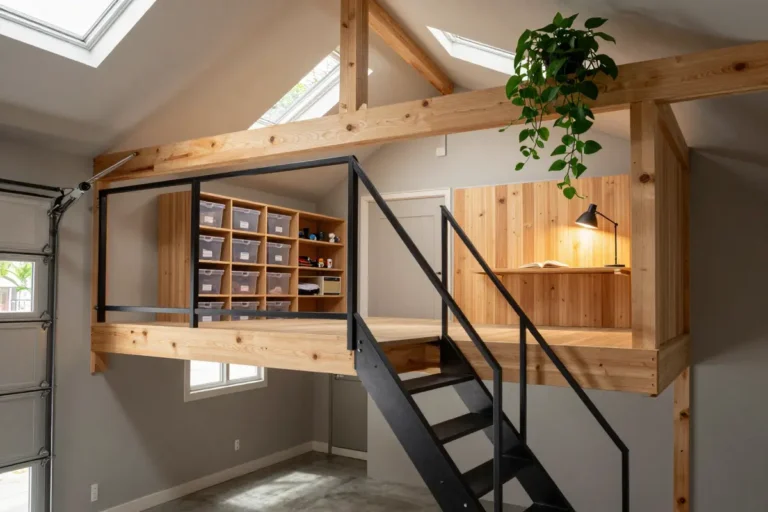
A straight ladder climbs straight up, while an alternating‑tread stair folds the rise into a compact zig‑zag. Using thin steel pipe or tube‑steel frames keeps the half‑loft’s visual weight low and the structural depth under two inches, far slimmer than bulky timber posts.
The alternating treads halve the stair’s footprint, letting a loft fit into a 6‑by‑8‑ft bedroom without sacrificing headroom. The design works best in studios or one‑bedroom apartments with 7‑8‑ft ceilings, where space is at a premium and an industrial aesthetic is welcome.
If the learning curve feels too steep, a simple wall‑mounted ladder or a conventional straight stair is a safer fallback. DIY assembly is possible for seasoned handymen, but welding and load‑bearing calculations usually call for a professional contractor.
- minimal visual bulk
- easy integration with industrial decor
- requires learning curve
- limited load capacity
- Frame material: steel pipe
- Footprint reduction: 50% vs straight stairs
- Ideal ceiling height: 7‑8 ft
4. Ceiling-Hung Platform Loft for High-Ceiling Studio Apartments
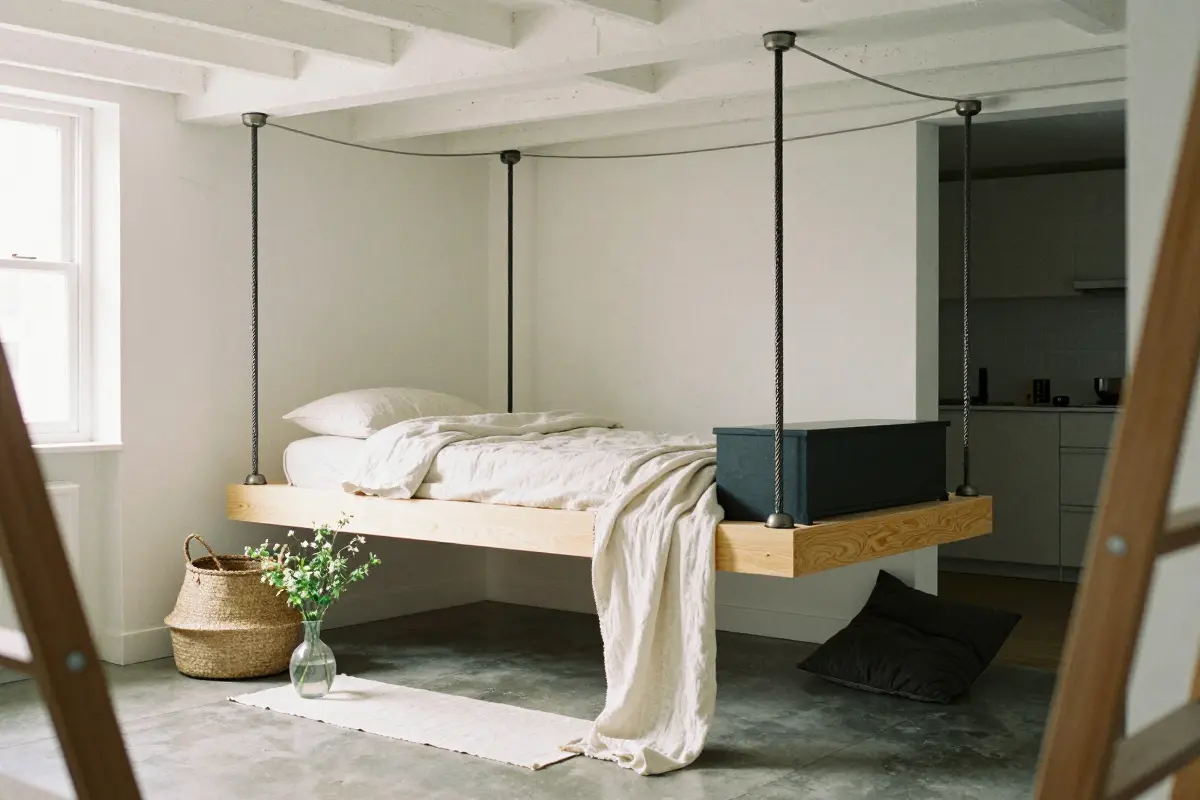
A studio with a 12‑ft ceiling can gain a full sleeping platform by suspending a plywood deck from threaded steel rods anchored into the exposed joists. The rods are rated for at least 2,000 lb, matching the King loft’s capacity, and a secondary safety cable provides backup in case a primary anchor fails.
Installation usually spans 1-2 weeks and includes full‑color 3D renderings to confirm layout before any cutting. The system stays permanent once the joists are drilled, so it’s unsuitable for most rentals where structural changes require landlord approval.
DIY is possible only for seasoned carpenters; most homeowners hire a professional to verify load limits and install the hardware safely. Clean the deck with a mild wood cleaner and re‑tighten bolts annually to maintain stability.
- frees floor space
- adds visual interest
- requires structural assessment
- not rental‑friendly
- Custom loft project: $9,000 to $40,000
- King loft frame: $1,600 to $1,800
Improper anchoring can cause collapse
5. Integrated Workstation Under a Semi-Enclosed Sleeping Loft
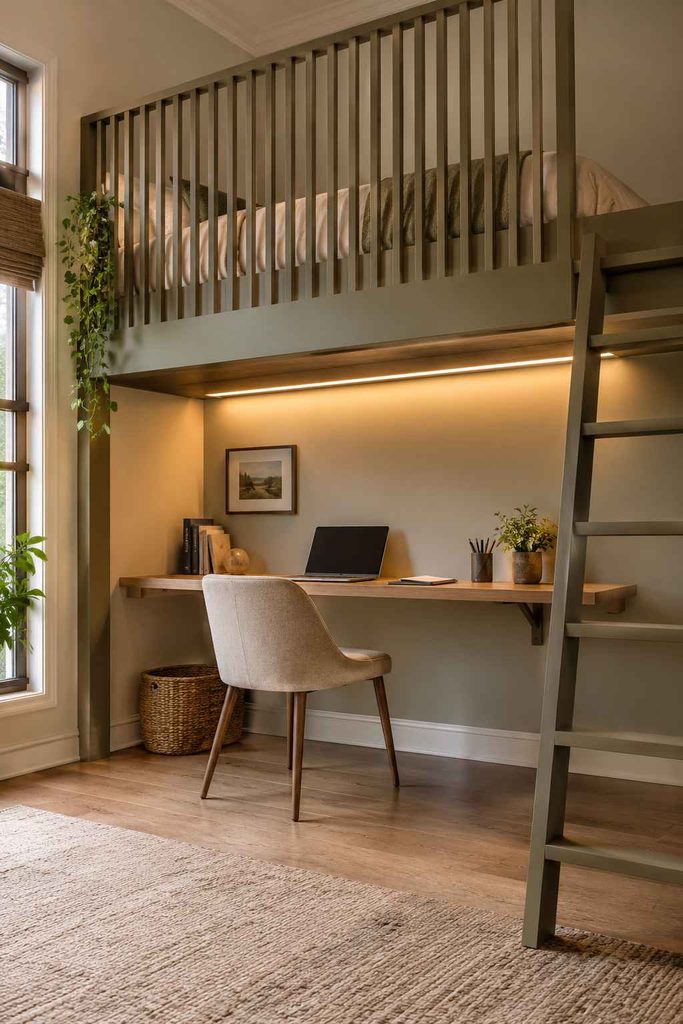
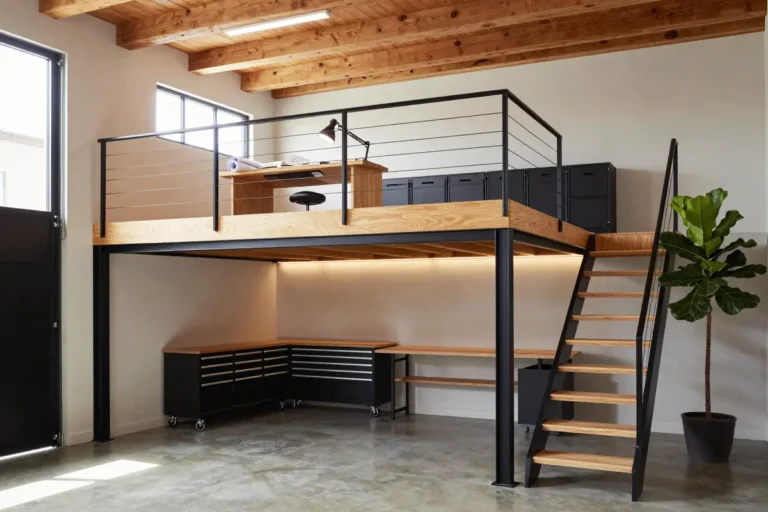
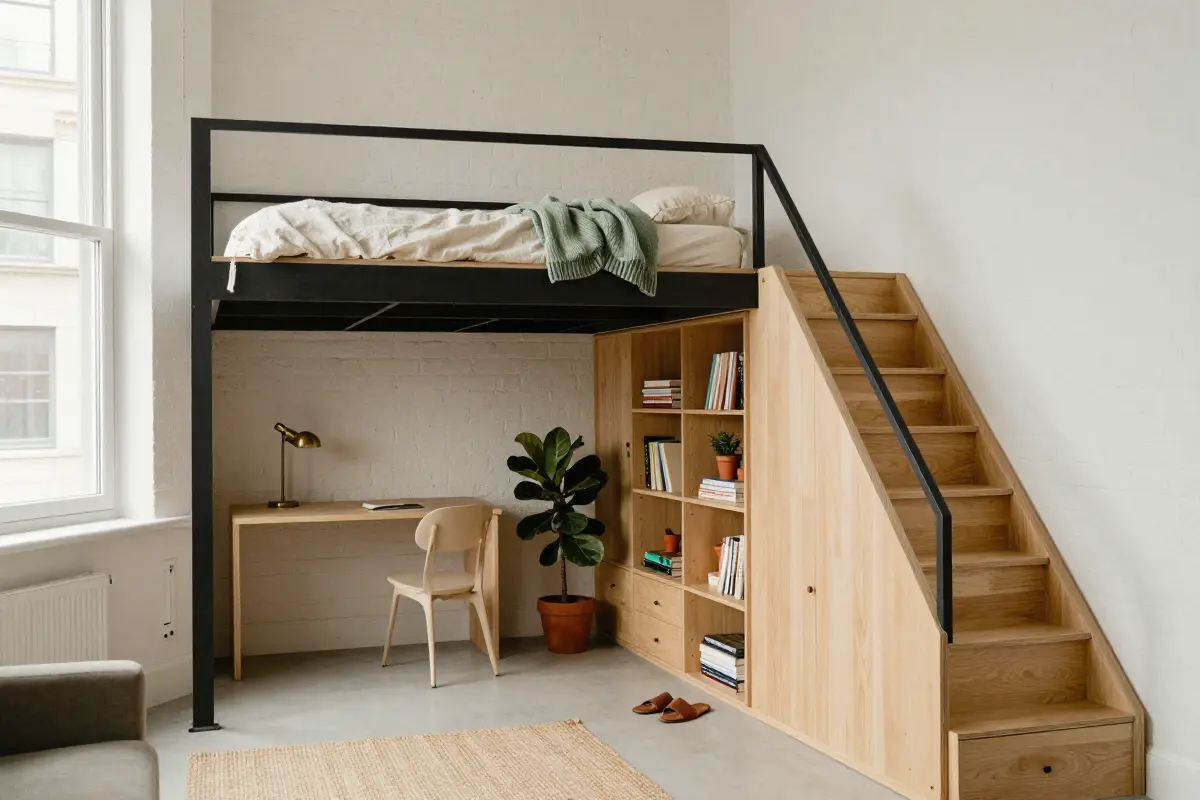
A low‑profile desk sits directly beneath a slatted sleeping loft, its frame forming a subtle screen that hides the mattress while keeping the work area open. Keep the platform at least 6.5 feet above the floor so you can walk comfortably and pull a chair in without ducking.
The loft’s ceiling height should be 9 feet or more; otherwise, the space feels cramped between the mattress and the upper ceiling.
Install a thin LED strip along the underside of the loft deck, angled toward the desk surface. This eliminates dark shadows that typical overhead fixtures create and gives even illumination for reading or laptop work.
A tip: mount the desk to the wall rather than the loft frame to prevent wobble when you lean on the surface.
- extra floor space
- clear visual separation
- requires high ceiling
- limited to loft‑friendly rooms
6. Pocket-Door Box Loft Structure with Concealed Wardrobe
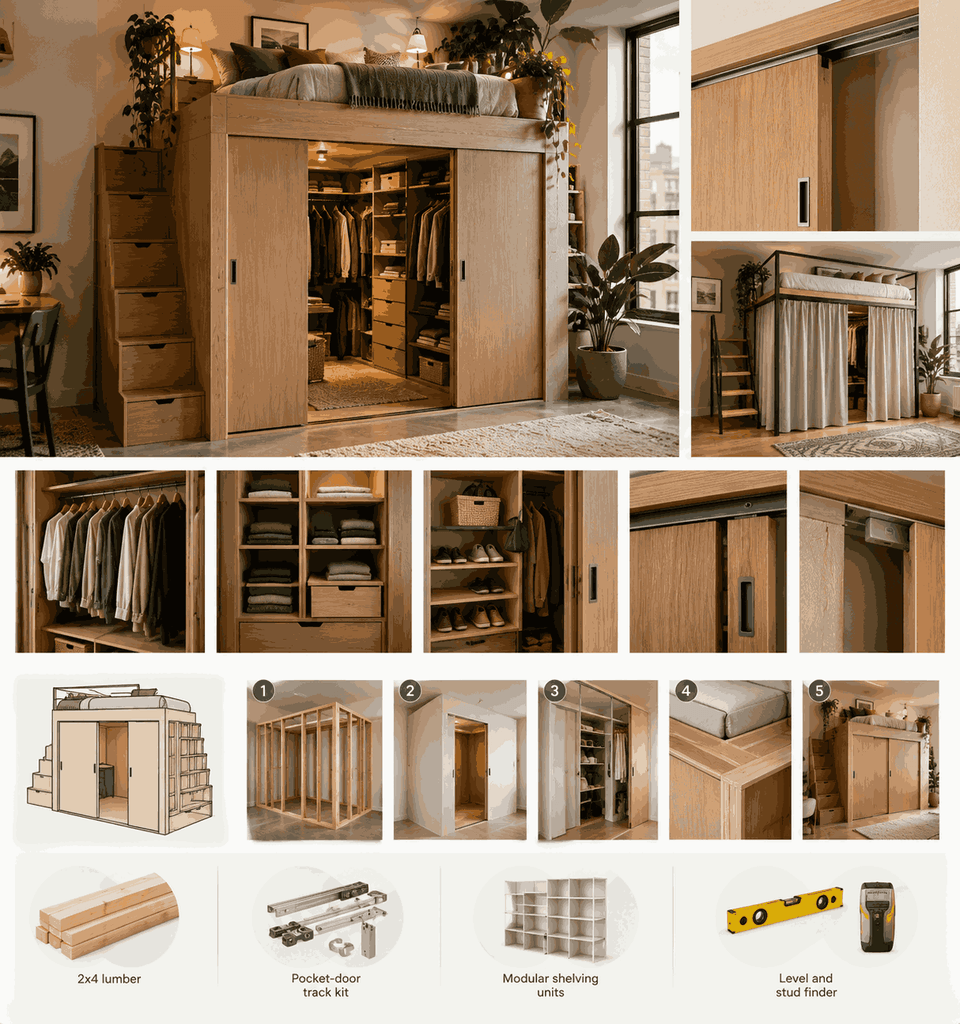
Technique-spotlight: a timber box loft with sliding pocket doors hides a wardrobe beneath the sleeping platform. The lower chamber is framed with 2x4s, insulated, then closed with drywall or plywood, while the upper deck sits directly on the box top.
Inside, modular shelving separates shirts, pants, and accessories, keeping everything visible and reachable.
For renters, replace the permanent walls with freestanding modular cabinetry that slides on a low‑profile track; the bed deck can rest on the cabinet tops without attaching to the floor or ceiling.
If the visual weight of a full box feels too heavy, consider an open‑frame loft with curtain‑covered storage instead.
DIY is doable for seasoned carpenters, but most homeowners will need a professional to ensure the pocket‑door hardware aligns and the box can support the bed load.
Add a soft‑close latch to the pocket doors for quieter daily use.
- Hidden storage
- Clean silhouette
- Visual bulk
- Requires structural framing
- 2×4 lumber
- Pocket-door track kit
- Modular shelving units
- Level and stud finder
7. Corner Wedge Loft Platform for Tight Square Footages
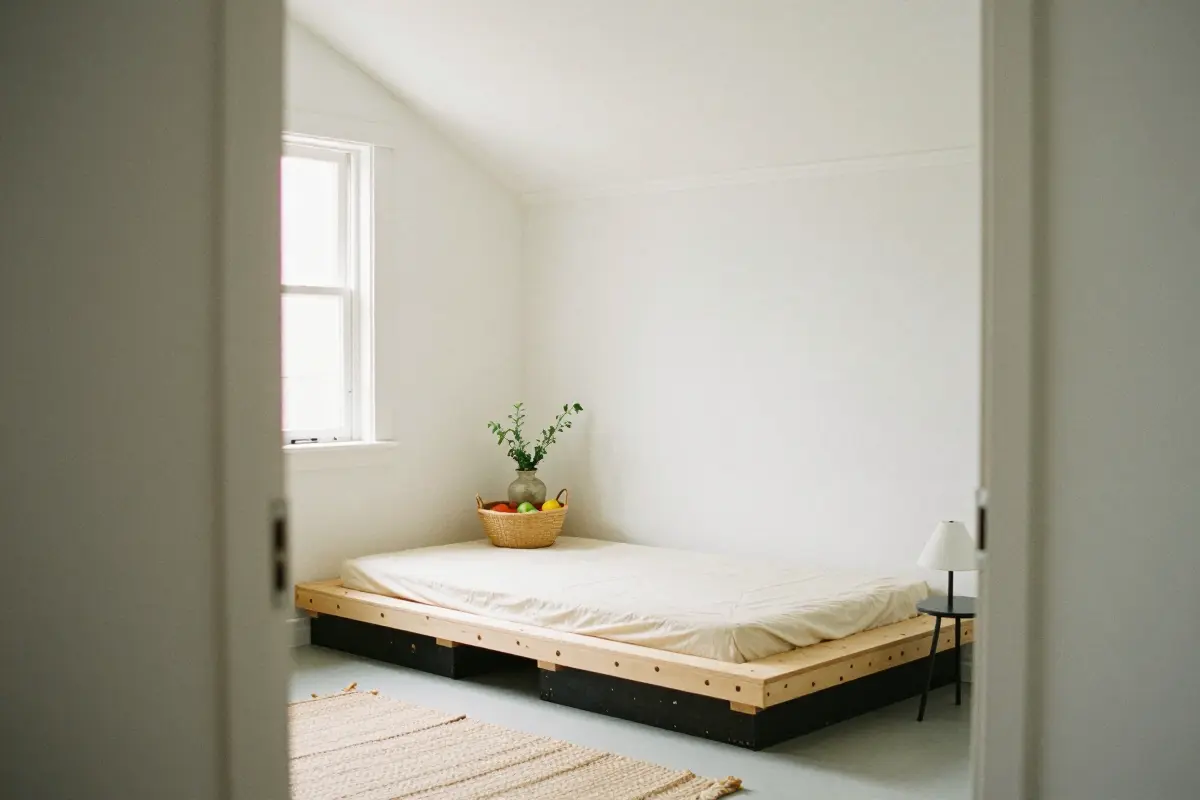
A cramped studio that forces the bed into the middle of the room leaves no floor for a desk or lounge area. A corner‑wedge loft platform tucks the mattress into an unused triangle, keeping windows and door swings clear.
Calculate the platform’s angle by measuring the two adjoining walls, then cut joists to match the hypotenuse; a 12‑ft span typically needs 2×6 lumber spaced 16 in. apart. The narrow tip of the triangle often becomes dead space, and the head of the bed can end up too close to a sloped ceiling pitch, making the sleeping position uncomfortable.
This solution works best in studio apartments or tiny one‑bedroom homes where the corner is at least 6 ft wide. DIY‑savvy owners can build it with basic tools, but a structural engineer should verify load limits for larger spans.
- Saves floor space
- Keeps windows clear
- Awkward dead corner
- Limits mattress placement
Head too near sloped ceiling can cause discomfort
8. Double-Sided Storage Staircase Loft System
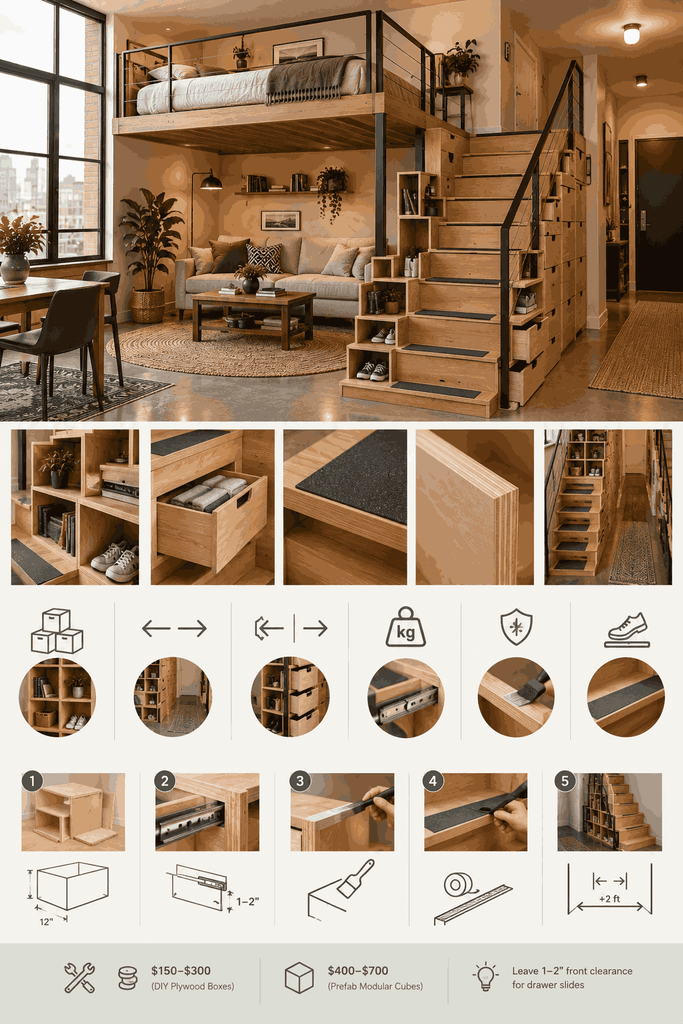
Technique‑spotlight: stair risers built as open cubbies on one side and pull‑out drawers on the other turn the staircase into dual‑access storage. Each step becomes a 12‑inch deep box, so you can store books, shoes, or pantry items without crowding the living area.
Because you need clear floor space on both sides of the stairs, the overall footprint grows by about two feet, a common trade‑off for the extra capacity. If your loft can’t spare that space, wall‑mounted floating shelves provide a slimmer alternative.
Keep the system durable by sealing the plywood edges and wiping drawer fronts weekly; non‑slip tape on the treads should be replaced every six months to maintain night‑time safety.
A practical tip: install 1‑inch plywood boxes with a 1‑2‑inch front gap for smooth drawer slide installation.
- Dual‑sided access
- Maximizes dead space
- Requires extra floor width
- Drawer hardware wear over time
- DIY plywood boxes $150 to $300:
- Prefab modular cubes $400 to $700:
Leave 1‑2 in front clearance for drawer slides
9. Tension-Pillar Modular Loft Platform (Renter-Friendly)
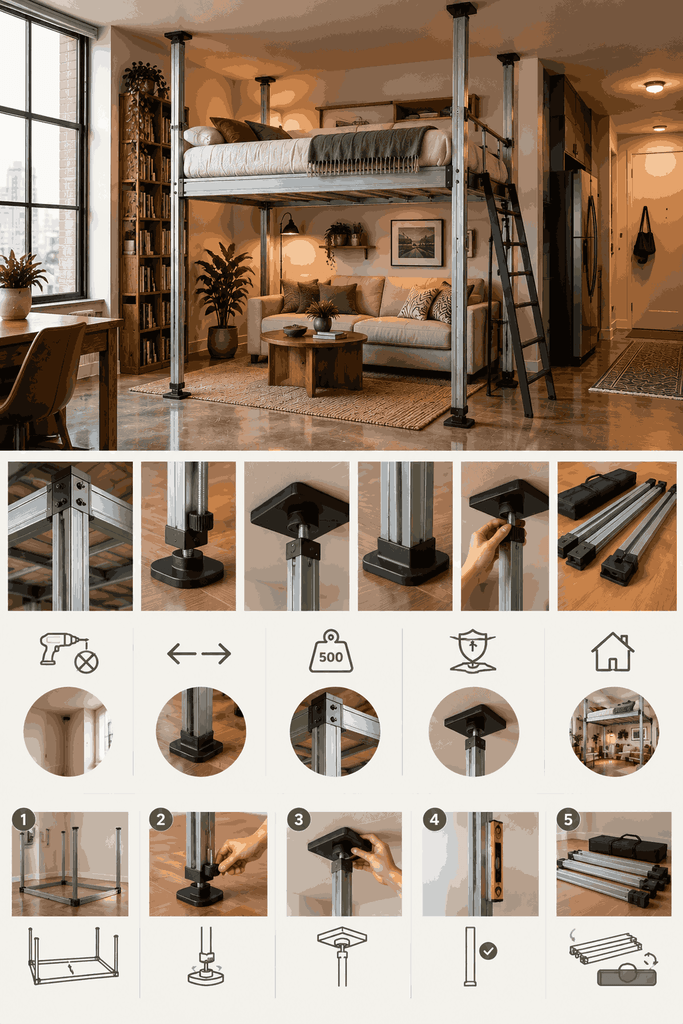
The steel‑tube posts and aluminum cross‑beams give the platform a sleek industrial look while staying light enough to move. Heavy‑duty floor‑to‑ceiling tension rods lock into rubber‑grip pads that rely on floor surface friction, so no drilling or permanent framing is needed.
Each post bears up to 500 lb, and padded ceiling plates protect drywall from point pressure. This system works best in one‑ or two‑bed apartments where renters want a sleeping loft without sacrificing wall space.
Regularly check the tension knobs for loosening and avoid bumping the posts with furniture, as impact can reduce stability. To disassemble, loosen each tension bolt, remove the ceiling pads, and fold the cross‑beams for compact storage before moving.
- No drilling
- Easy reconfiguration
- Requires frequent tension checks
- Can be damaged by impacts
- Lay out platform base and align posts
- Insert floor‑grip pads and tighten tension bolts
- Place ceiling‑plate pads against drywall
- Verify post tension with a level
- Disassemble by loosening bolts and storing components
10. Raised Split-Level Deck Loft with Sunken Lounge Floor
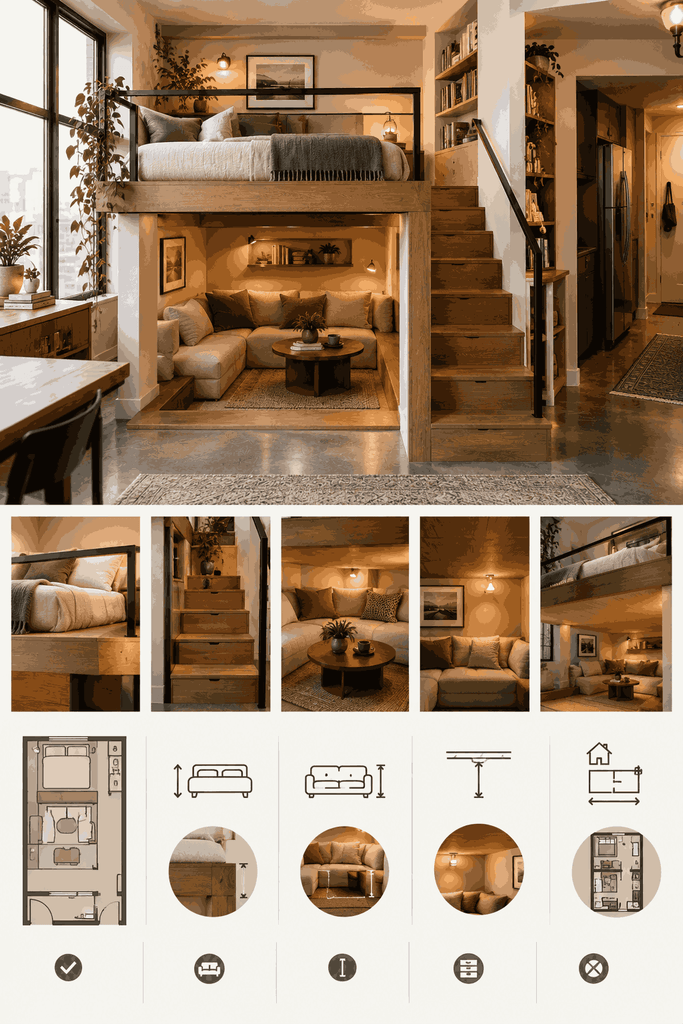
Unlike a full‑height loft that consumes an 8‑foot ceiling, a raised split‑level deck loft lifts the sleeping platform only 3 to 4 feet, leaving a sunken seating nook beneath.
The low rise gives the bedroom a cozy, nest‑like feel while the recessed lounge provides a place to read or sip coffee without needing full standing headroom.
It works best in studio apartments or small one‑bedroom units where floor plans measure 8‑10 feet wide and 10‑12 feet long. If you need a standing‑height loft or extra storage, a traditional platform bed with drawers is a better fit.
- Preserves ceiling height
- Adds built‑in lounge
- No standing room below
- Limited storage
- Lift height: 3‑4 ft
- Lounge depth: 2‑3 ft
- Ceiling clearance above loft: 4‑5 ft
How to Calculate Overhead Clearance and Anchor Safety for a Tiny Loft
You’ll end up with exact ceiling clearance numbers and a safe anchoring plan, and the whole process is a moderate DIY job you can do in an afternoon.
- Measuring tape
- Stud finder
- Level
- Pencil
- Safety glasses
- Measure from the floor to the ceiling at the intended loft spot, noting the lowest point around ducts or beams.
- Use a stud finder to locate solid wall studs near the loft edge and mark where support brackets will attach.
- Pick a mattress thickness that leaves at least six to eight inches of headroom once the loft floor is in place.
- Install safety railings around the loft perimeter, anchoring them into the marked studs, keeping them snug but not overtightened.
- Stand under the loft to verify clearance and airflow, adjusting any components that feel too tight.
The most common mistake is forgetting to account for floor joist depth, which can cut headroom; measure twice and check the joist profile before cutting.
Frequently Asked Questions
How much ceiling height do you need for a tiny loft bed?
You need a minimum ceiling height of 9 feet to comfortably build a tiny loft bed, allowing at least 36 inches of clearance between the top of the mattress and the ceiling alongside 6.5 feet of usable space below.
How do you keep a sleeping loft cool during warm weather?
Position a small wall-mounted or clip-on fan to circulate air across the bed platform, use open slatted side railings instead of solid walls, and opt for thin cotton or linen bedding to offset heat rising to the ceiling.