11 Earthy Bedroom Wall Decor Ideas That Feel Like a Nature Retreat
11 Earthy Bedroom Wall Decor Ideas That Feel Like a Nature Retreat
When you pull back the curtains and the first thing you see is the beige paint of your bedroom wall, it’s easy to feel the space is missing the calm you crave after a long day.
The list that follows gives you eleven earthy wall treatments you can assemble with everyday finds or a quick trip to a hardware aisle.
Renters, small‑space dwellers, and anyone who wants a nature‑inspired backdrop will find at least one project that fits a budget and a skill level.
Pick a single piece or layer several to turn your bedroom into a quiet retreat without rebuilding the room.
1. Pressed Botanical Gallery Wall with Oak Frames
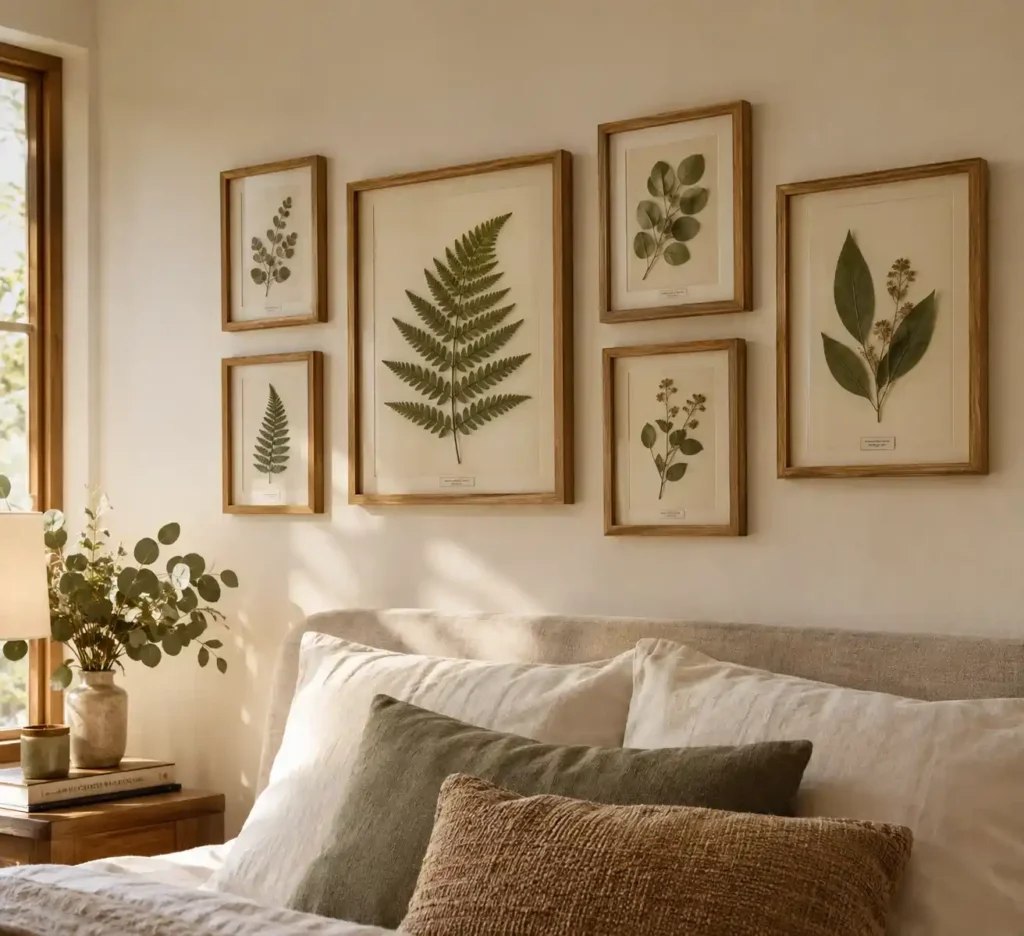
A solid oak frame with UV‑protective glass keeps pressed ferns looking fresh. Gather fresh ferns or eucalyptus in the early morning when they’re still crisp.
Tie small bunches with twine, then press them between heavy books for two to three weeks.
Once dry, arrange the leaves on acid‑free backing paper, leaving space for each specimen. Choose double‑glass floating frames so the natural wall color shines through the edges.
The oak adds warmth and the glass shields the green pigments from ultraviolet exposure, which otherwise causes browning within six months.
Hang the gallery at eye level, but avoid windows or bright lamps that send direct sunlight onto the panes.
A quick tip: slip a thin sheet of archival tissue behind each leaf to stop it from adhering to the glass over time.
If you’re uneasy about the inevitable fade, swap the botanicals for archival‑quality botanical prints that mimic the look without the aging risk.
Expect the pressed leaves to lose some vibrancy after a year; a gentle dusting with a soft brush and occasional re‑framing will extend their appeal.
For a renter‑friendly version, use removable adhesive hooks and lightweight acrylic frames instead of nailed oak. Add a small label with the collection date to track the lifespan of each piece.
2. Hanging Foraged Driftwood or Eucalyptus Branch
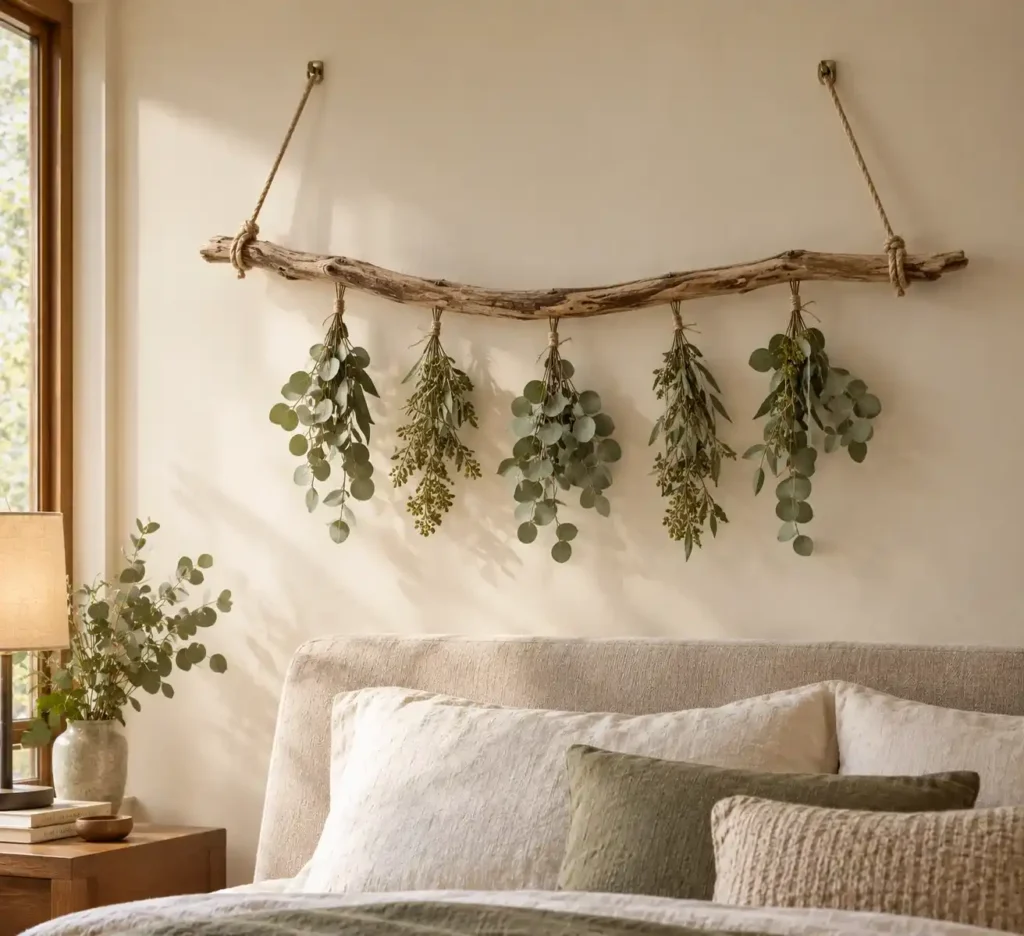
Cut the foraged branch to a length that fits the wall space, leaving a few inches extra for knotting the rope.
Sand the surface with 120‑grit paper, then wipe it with a solution of equal parts water and white vinegar to kill any lingering insects.
Let the branch dry in a sunny, well‑ventilated corner for at least two weeks; a damp piece will warp and could attract mold.
Once dry, drill two ¼‑inch holes near each end, thread a natural cotton rope through, and tie a secure bowline knot.
Choose 3/16‑inch toggle bolts or metal drywall anchors rated for at least 8 lb each; the branch’s weight plus rope should stay under 12 lb to avoid stress on the drywall. Install the anchors at eye level, then loop the rope over the bolts and pull tight.
A quick tip: angle the rope upward a few degrees before knotting so the branch settles flat against the wall without sliding.
Avoid placing the branch directly above the headboard unless the anchors are rated for heavy loads; an unanchored driftwood can become a safety hazard if it shifts during sleep.
DIY‑ers can handle the preparation and mounting, but a professional should be consulted for branches over 15 lb or when mounting on plaster. Finish by adding a dab of clear silicone at each anchor to keep the rope from slipping.
3. Textured Lime Wash Paint Accent Wall
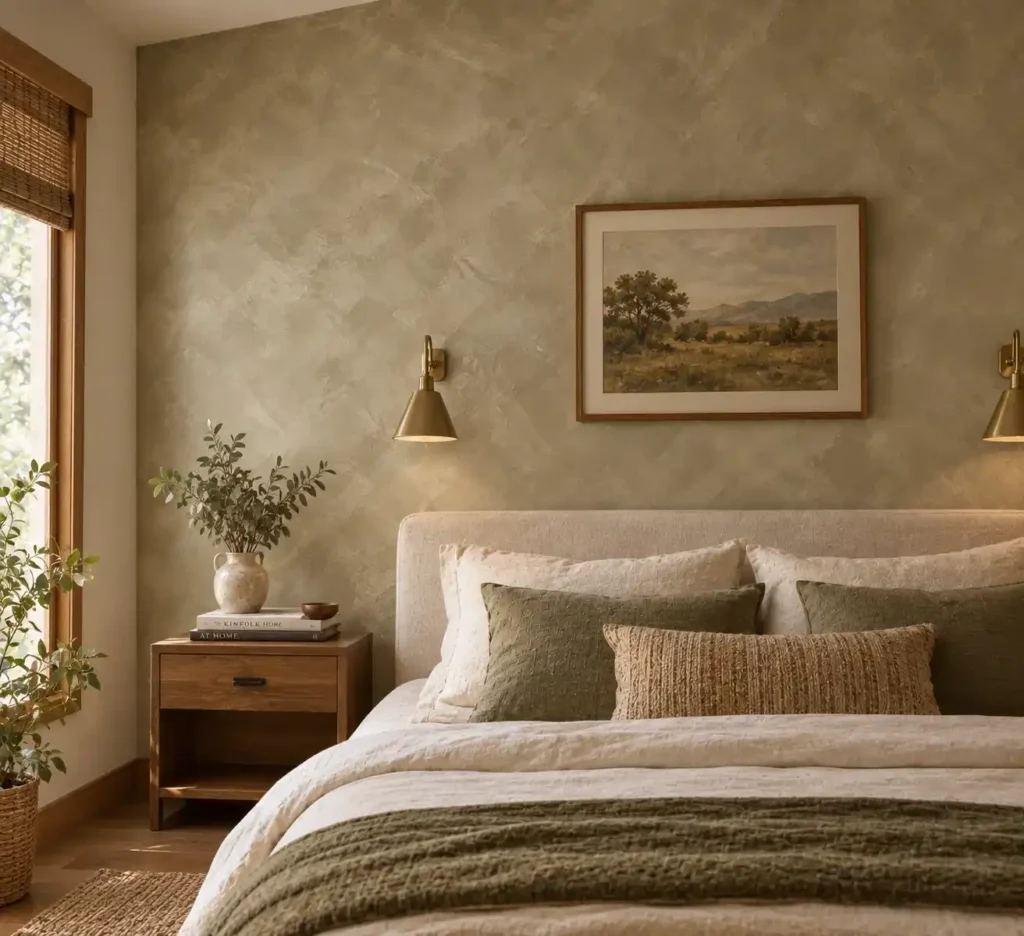
Grip a wide‑taper brush and pull it across the wall in a cross‑hatch pattern, letting the bristles overlap slightly.
The criss‑cross strokes create the illusion of natural stone and let the lime wash settle into a chalky texture.
Mix a small amount of water into the lime wash just before you start; the thinner mix stays workable for about 30 minutes, giving you enough time to cover an entire accent wall without streaks.
Apply the first coat thinly, then let it dry for 24 hours before adding a second, slightly heavier layer for depth. Use a soft‑bristled brush for the second pass to keep the texture subtle.
Lime wash soaks into the plaster, making it highly porous. If you ever need a new color, expect intensive sanding down to the drywall or a mineral‑binding primer designed for lime surfaces. This makes the finish unsuitable for renters or anyone who may want a quick color change.
For those concerns, a peel‑and‑stick stone‑look wallpaper offers a similar vibe without permanent commitment.
DIYers with steady hands can achieve a decent result, but a professional painter can ensure an even stone‑like finish and avoid uneven patches.
After the final coat, protect the surface with a clear, breathable sealant to reduce dust and extend durability.
4. Woven Seagrass and Rattan Basket Trays
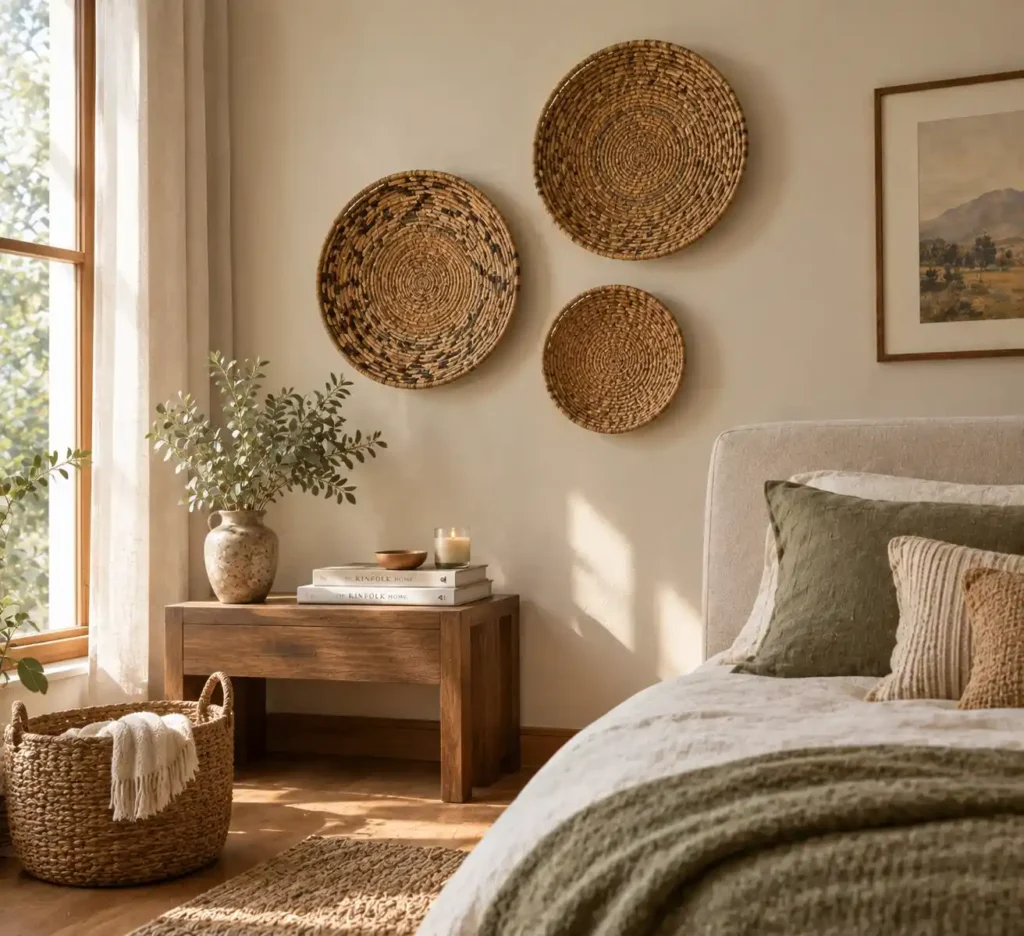
A trio of shallow seagrass trays, each with a slightly different weave, rests on the bedroom floor, their natural fibers catching the soft morning light.
Lay three to five flat baskets on the floor first; move them until the patterns and diameters feel balanced.
Once satisfied, mark the top edges with painter’s tape, then lift each basket and align a small brass‑finish nail at the taped spot.
The nails sit shallow enough to avoid damage, making the arrangement renter‑friendly and easy to remove later.
The woven trays add texture without the weight of heavy frames, creating a nature‑inspired focal point that feels light and airy.
Because the fibers have tight crevices, dust settles inside, so a weekly vacuum with a soft brush attachment keeps them looking fresh.
A quick tip: attach a tiny piece of felt to the back of each basket; it protects the wall and prevents the tray from shifting while you hammer the nail.
This setup works in any bedroom size because the baskets occupy only a small wall segment. The visual interest stays low‑commitment, and the simple brass nails leave no permanent holes, preserving the rental’s original condition.
5. Linen Fabric Wall Hanging with Wooden Dowels
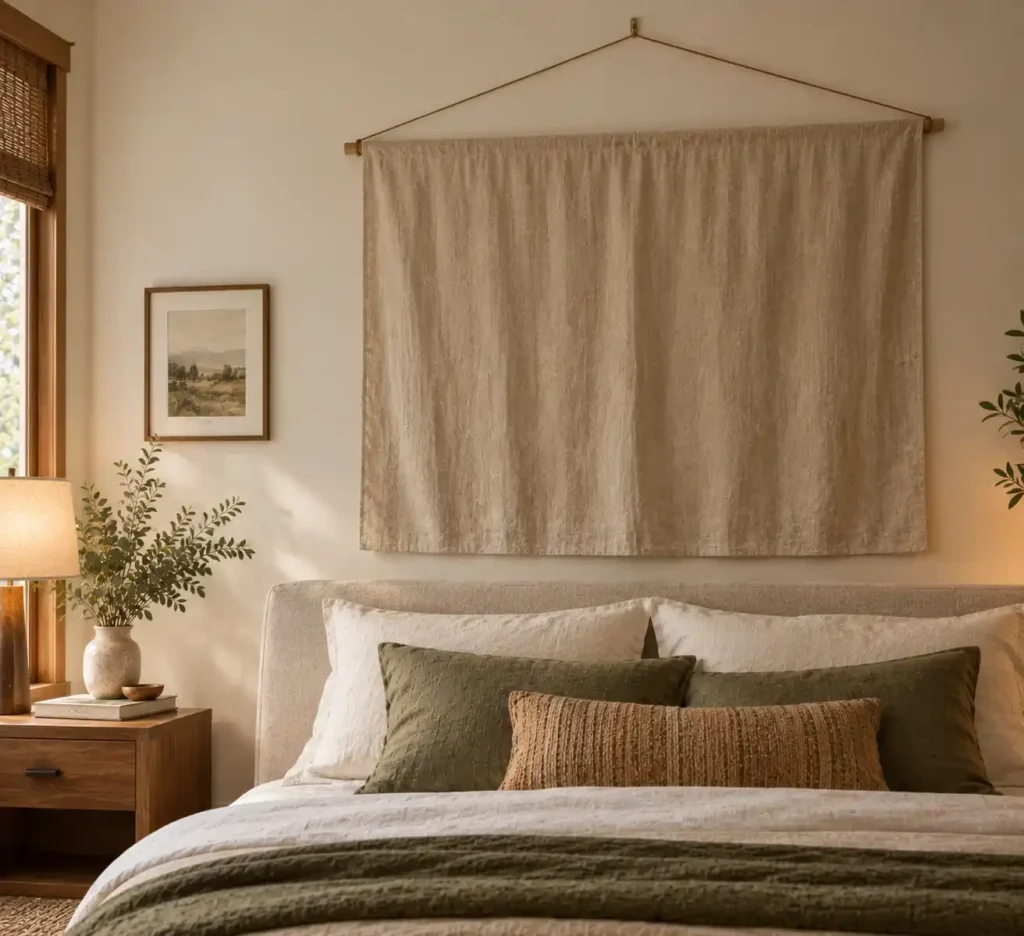
Heavy unrefined flax linen drapes across the wall, adding a soft, natural texture that also muffles bedroom echo.
An oak dowel, cut to the fabric’s width, anchors the piece; thread a leather cord through the top edge and tie it to a removable adhesive hook. This avoids drilling, keeping the setup renter‑friendly.
The linen’s weight holds the dowel steady while its loose weave creates a gentle, tactile backdrop for pillows or artwork. It works best in a minimalist master suite or a guest room where calm ambience is the priority.
Because flax linen wrinkles easily, give the hanging a quick steam session every few weeks; the heat relaxes the fibers and restores a smooth look.
After steaming, run a lint roller over the surface to lift dust without saturating the material. Avoid washing, which could shrink the textile and ruin the drape.
If you need a temporary fix, replace the adhesive hook with a tension rod that slides between the wall and ceiling. This method lets you swap the hanging for a new color without leaving marks.
6. Terracotta Clay Wall Sconces with Soft LED Lighting
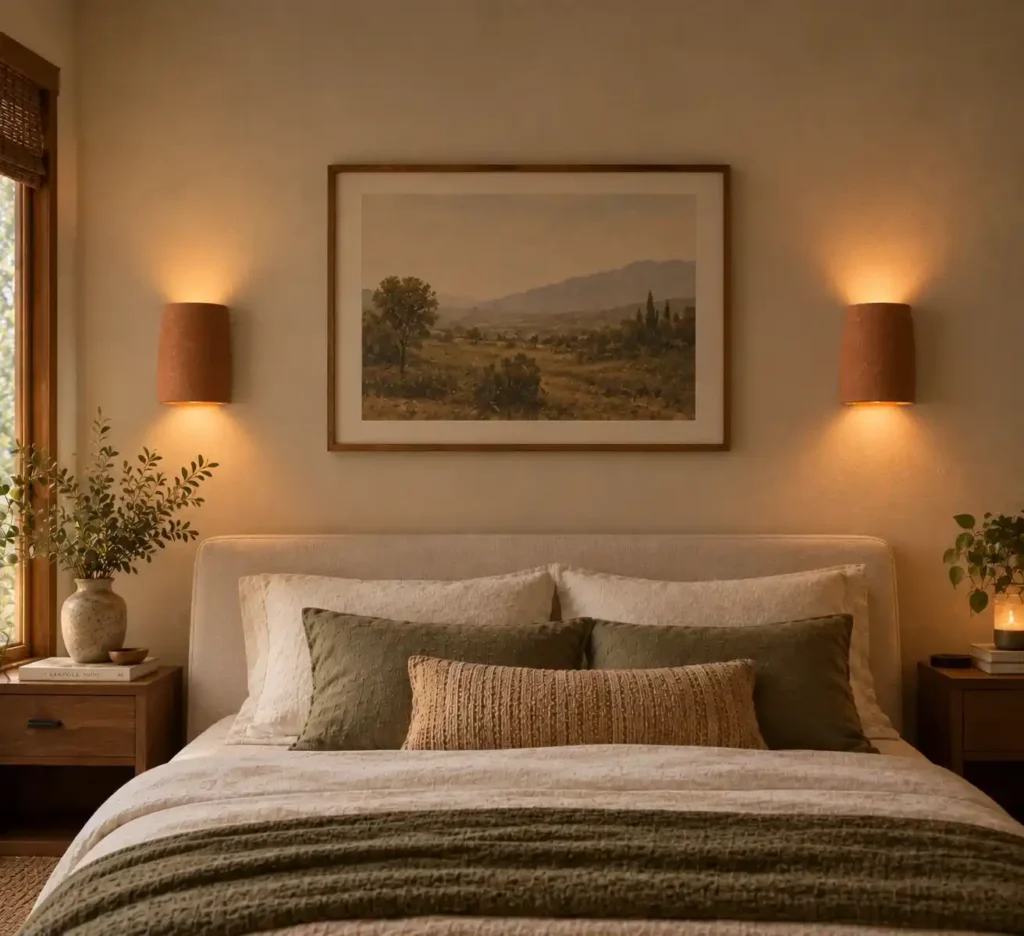
Unglazed terracotta clay forms the body of these wall sconces, giving each piece a raw, earthy texture that catches the eye.
The porous surface holds the warm glow of a 2200‑2700 K LED, echoing the orange and brown tones of the material.
For renters, choose battery‑operated puck lights with a remote; they attach with adhesive clips and leave no holes, while a hardwired version works best in a permanent space.
The soft LED spreads a gentle light that softens the clay’s natural roughness, creating a cozy nook without harsh shadows. Install the sconces at eye level to balance the room’s proportions and avoid glare.
A quick tip: before mounting, wipe the terracotta with a damp microfiber cloth, then dab a thin layer of clear, water‑based sealant on the exposed areas to guard against oil fingerprints during handling.
If you prefer a wired setup, run the cord through an existing outlet using a surface‑mount raceway that can be painted to match the wall.
This keeps the installation tidy and reversible. Add a small, dimmable switch on the bedside table so you can lower the light for reading without reaching for the remote.
7. Floating Raw-Edge Oak Shelves with Hardy Trailing Plants
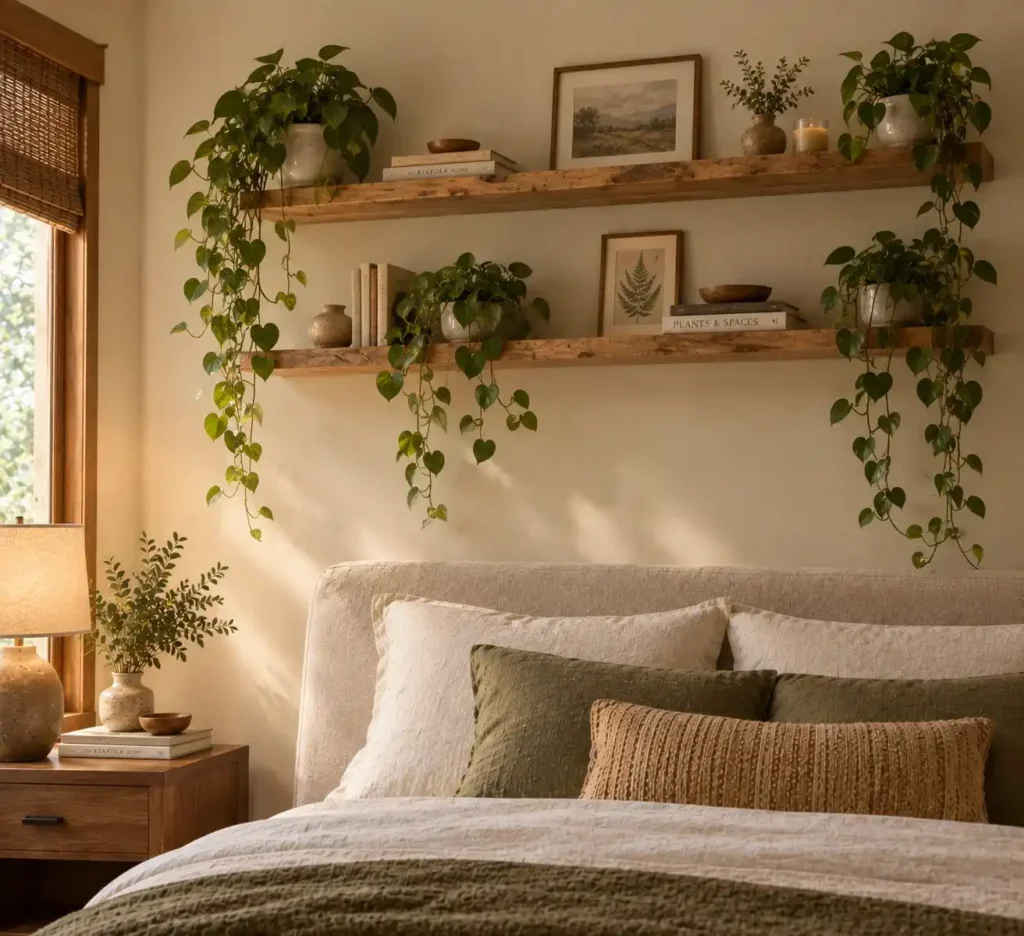
A pair of raw‑edge oak shelves stretches across the wall, their natural grain catching the soft bedroom light.
I anchored each shelf with 2‑in. lag bolts into the wall studs, spacing the brackets a foot apart to distribute the weight of soil and pots.
A stud finder and a level keep the installation straight, and a drill with a 1/4‑in. spade bit makes the pilot holes quick.
Pothos and Heartleaf Philodendron thrive in low‑light corners and send vines down the shelf over weeks.
I place the plants in inexpensive clear nursery pots, then slide those into sealed ceramic cachepots that have no drainage holes; trim the vines monthly to keep growth tidy.
8. DIY Plaster or Joint-Compound Textured Canvas
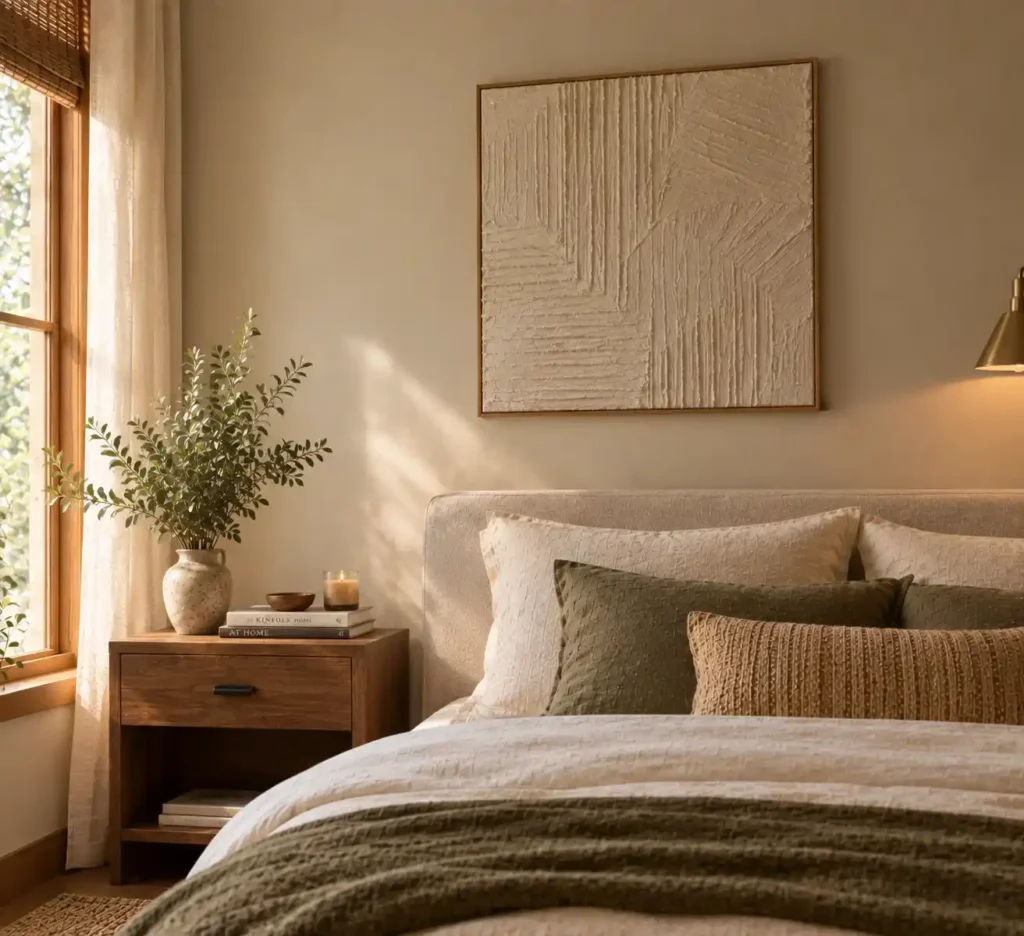
Spread a thin layer of joint compound onto a 12‑inch blank canvas using a ½‑inch notched trowel.
The notches create a subtle ridged pattern that catches light like natural stone. Let the surface dry completely, usually 24 hours, before handling.
Sand the dried plaster lightly with 220‑grit paper to smooth any high spots.
Then brush on one coat of matte varnish, allowing it to dry between coats. The varnish locks in the plaster and stops the fine white dust from escaping.
A quick tip: work in a well‑ventilated room and wear a dust mask while sanding; the dust settles quickly but can irritate lungs.
This project fits a minimalist bedroom corner where a single piece can act as a focal point without overwhelming the space.
It especially appeals to renters who need a removable art solution; the canvas hangs with a simple picture hook.
The result feels like high‑end mineral art but costs under $20 for the canvas, joint compound, and varnish.
Avoid skipping the varnish step, because unsealed plaster chips and leaves a powdery residue on bedding.
9. Vertical Cork Tile Boards with Brass Push Pins
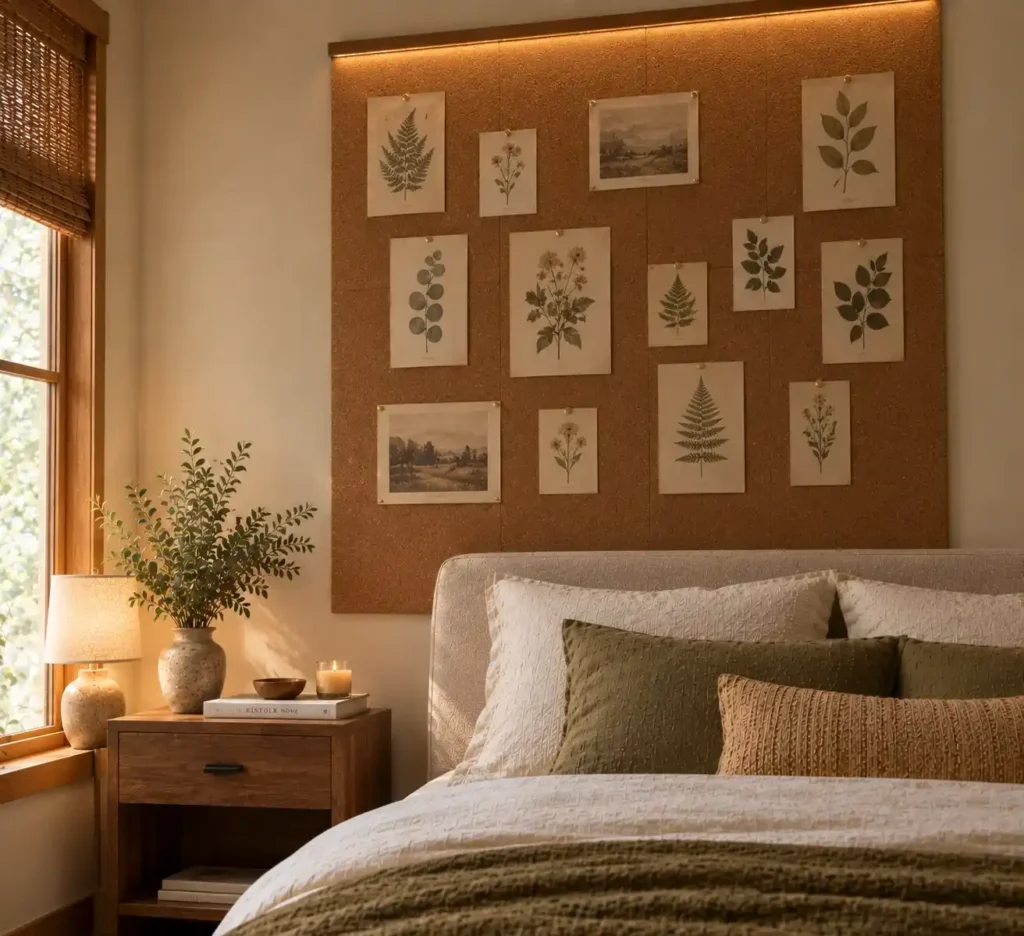
The adhesive backing on cheap cork tiles often rips drywall when you try to pull it off.
Swap the backing for adhesive mounting strips that claim damage‑free removal; they hold the tiles securely and come off cleanly.
Measure the wall, cut the cork to the desired height, then press each strip into the back of the tile before aligning it on the studs or a solid backing board.
Use a level and a small rubber mallet to keep the tiles flat while the strips set.
Vintage botanical prints pinned with brass push pins give the board an earthy vibe without the visual clutter of office paperwork. Arrange the prints in a loose grid, leaving breathing room for each leaf illustration.
Cork will crumble around the corners after frequent pinning, so it won’t last as long as a wood panel or framed collage.
Quick tip: score the cork with a utility knife and sand the cut edges; this prevents splintering and keeps the board looking tidy.
For renters, the mounting strips avoid new holes, making the display fully reversible when you move out.
Add a thin LED strip along the top edge for soft ambient light that highlights the botanical images after dark.
10. Framed Vintage Geological and Forest Maps
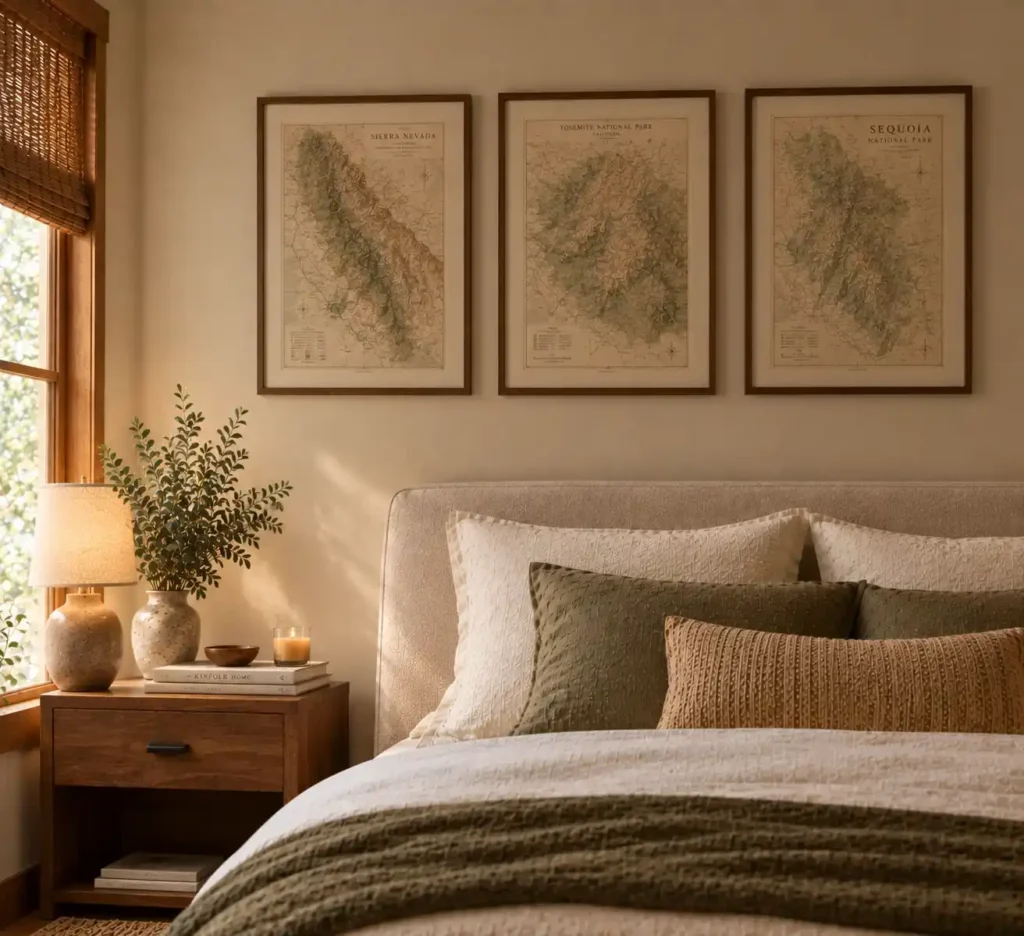
A faded sepia topographic map of the Sierra Nevada stretches across the wall above the nightstand, its contours softened by a warm walnut frame and an off‑white mat.
The muted browns and greens echo the room’s natural palette, creating a subtle retreat without overwhelming the space.
Source affordable reprints from online archives or specialty art sites; prices often sit between $12 and $25 per sheet. Choose a frame with a shallow rabbet so the map sits close to the glass, preserving the vintage feel.
Arrange three maps in a horizontal row, leaving a two‑inch gap between each frame. This alignment feels intentional and keeps the display from looking cluttered.
Quick tip: place an acid‑free foam board behind each print before inserting it into the frame. This prevents cheap paper from yellowing or curling, a common issue with non‑archival reproductions.
If maps don’t match your aesthetic, swap them for framed pressed‑leaf botanical illustrations; the same framing approach works equally well.
Before hanging, level the top edge of the leftmost frame and use that line to align the remaining pieces, ensuring a straight, cohesive arrangement.
11. Reclaimed Wood Slat Headboard Extension
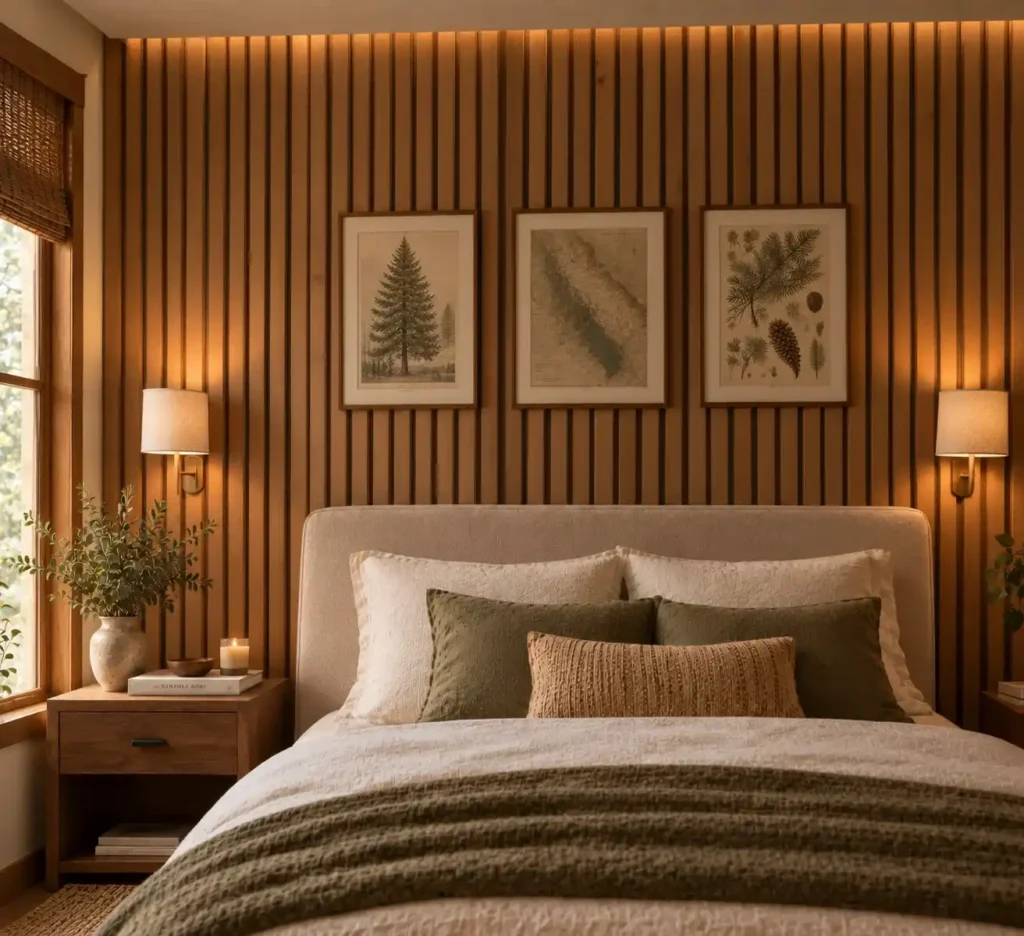
A wall of narrow, reclaimed pine slats rises behind the mattress, reaching up to the ceiling.
The vertical lines draw the eye upward, creating a forest‑like backdrop that feels larger than the room.
Use lightweight cedar or pine slats about 1‑inch thick to keep the load light enough for standard drywall anchors.
Space the slats 1‑2 inches apart; the gap lets light filter through while preserving the natural texture. Install a simple ledger board at floor level, then screw each slat into the board with 1‑½‑inch drywall screws.
For renters, mount the ledger with removable picture‑hanging strips and use toggle bolts that leave only tiny holes.
This approach stays reversible and avoids permanent damage.
The deep, narrow gaps between the wood slats are notorious dust magnets that demand dedicated monthly vacuuming.
A brush‑head attachment on a cordless vacuum clears the crevices quickly; a damp microfiber cloth can follow for a polished finish.
Because the installation adds visual height, it works best in master suites or loft bedrooms with ceilings of 10 feet or higher; a compact studio may feel overwhelmed.
DIYers with a drill, level, and stud finder can finish the project in a weekend, but anyone unsure about load‑bearing walls should consult a professional.
Finally, apply a clear matte sealant to protect the wood from humidity and to ease future cleaning.
Your Next Nature‑Inspired Wall
These eleven ideas show how a single wall can echo a forest floor, stone cliff, or sun‑baked clay without a major renovation.
Start small, hang a woven seagrass basket or mount a cork tile board, to test the palette before committing to paint or floating oak shelves.
When you feel confident, layer a pressed‑botanical gallery or add terracotta sconces for a warm glow, and let trailing pothos soften the edges.
Remember to anchor heavy pieces securely and give textured finishes room to breathe. With a bit of patience, your bedroom will feel like a quiet hideaway you can step into each night.
Frequently Asked Questions
How do I make my bedroom walls look earthy without painting them?
You can add natural textures using renter-friendly decor like lightweight woven seagrass baskets, linen tapestries, or hanging a preserved eucalyptus branch from damage-free hooks.
Is it safe to hang heavy wood or clay decor directly above a bed?
It is only safe if you mount the decor directly into wall studs or use toggle bolts rated for heavy weight; avoid hanging heavy, glass-framed, or sharp objects directly over your sleeping area in case of seismic movement or accidental falls.
How do you keep natural and dried decor from collecting dust?
Dust natural wood and dried botanicals once a month using a hairdryer on its coolest, lowest setting, or use a soft-bristled vacuum attachment for heavier items like wood slat walls.
What colors pair best with earthy bedroom wall decor?
Soft, desaturated tones like sage green, terracotta, warm ochre, and muddy beige work best, as they mimic colors found directly in nature and don’t clash with natural wood tones.